How to organize and tag items using metadata
You can add metadata to zones, ad items, advertisers, and campaigns for personal reference and for organizational purposes. A metadata entry is a key-value pair that you can set and view in that element's properties page. You create a key, aka a variable, then add the value for that variable that applies to that element.
Let's say you want an easy way to remember the zones that are in the upper half of a webpage. You can do that by creating a metadata entry. Let's name the key upper_half. Then, for zones that are in the upper half of a webpage, you set the value of upper_half to true. For zones that are in the lower half, you set the value to false.
Metadata have no effect on how your ads look or perform. Think of them as notes or tags that help you identify and organize. Ensure that your metadata are necessary, consistent, and intuitive so that they'll remain useful.
Metadata restrictions
- Keys can be up to 255 characters long.
- Keys must be unique.
- You cannot set a value without a key.
- You cannot set a key without a value, except in ad items. Ad items automatically get the keys of the zone to which they are assigned, but you don't have to enter a value for those inherited keys.
Adding zone metadata
- Go to the page of the relevant zone (Your AdButler > Publishers > Your Publisher > Your Zone).
- Click Edit Zone Properties on the right menu. The Edit Zone window will appear.
- For the first metadata entry, simply fill in the fields under Metadata. Click Add Another Meta Key to add more entries.
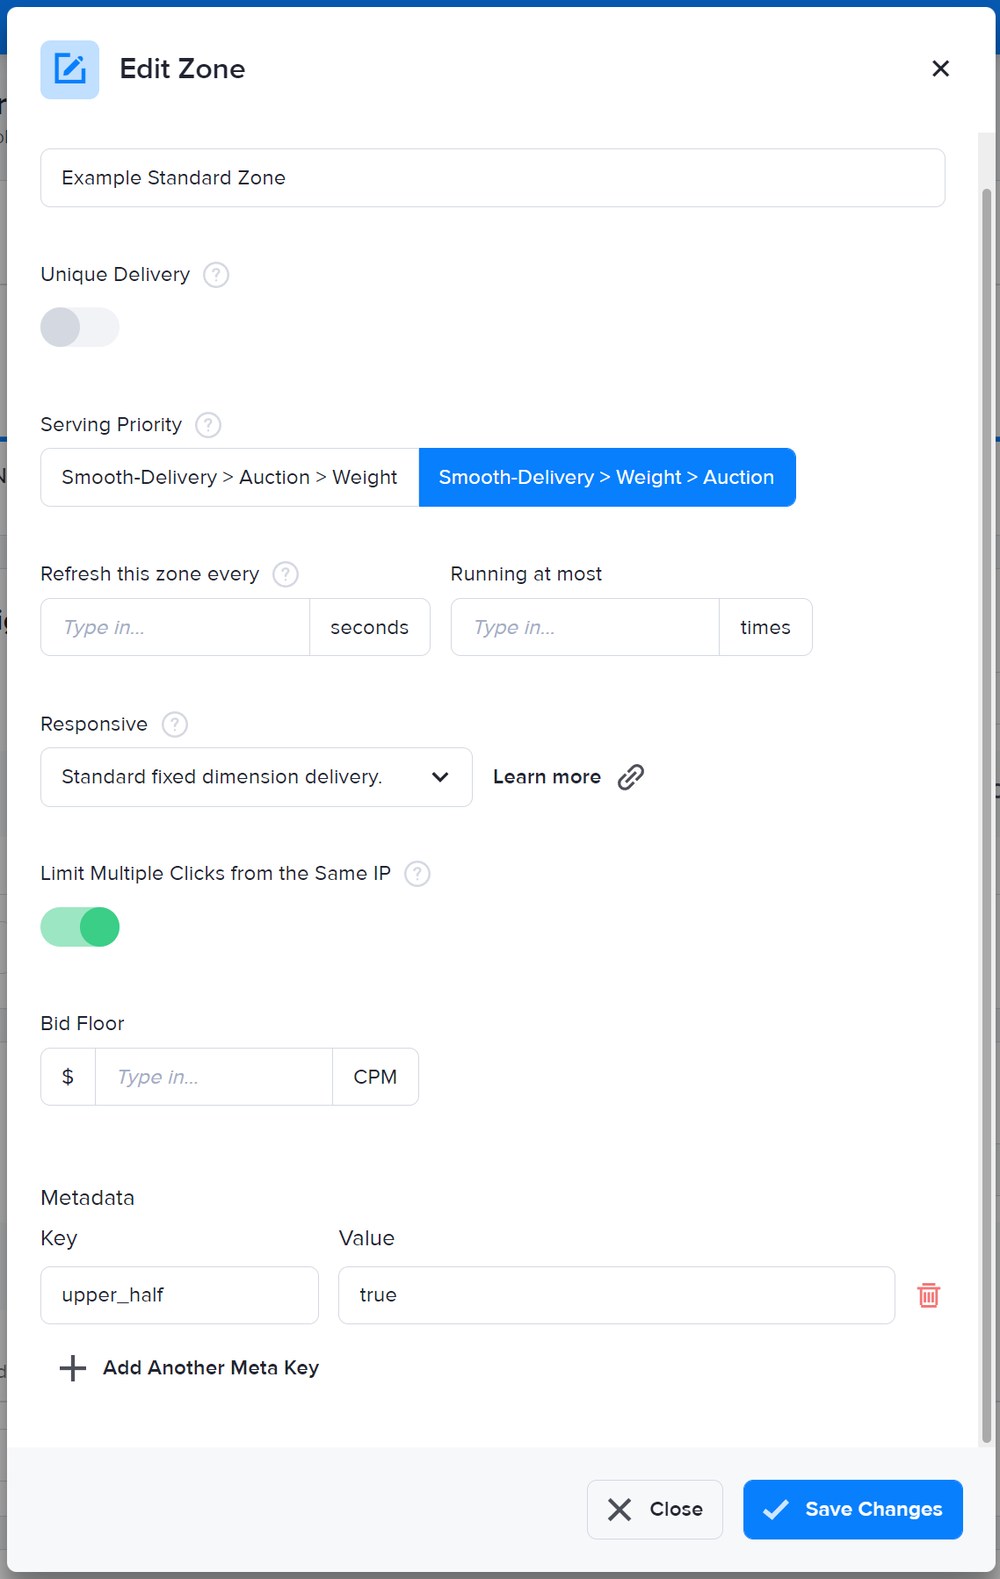
- Click Save Changes.
Click on the field of an existing metadata entry to edit it. Click on the trash can icon beside a metadata entry to delete it.
You can also add, edit and delete zone metadata fields using our Admin API if you have the API Access add-on for your account. For more information, read our API Documentation:
If you don't have the API Access add-on, you can file a request to edit your subscription.
Adding ad item metadata
- Go to the page of the zone (Your AdButler > Publishers > Your Publisher > Your Zone) or campaign (Your AdButler > Advertisers > Your Advertiser > Your Campaign ) to which the ad item is assigned.
- Click on the name of the ad item. Its properties page will appear.
- For the first metadata entry, simply fill in the fields under Metadata. Click Add Another Meta Key to add more entries.
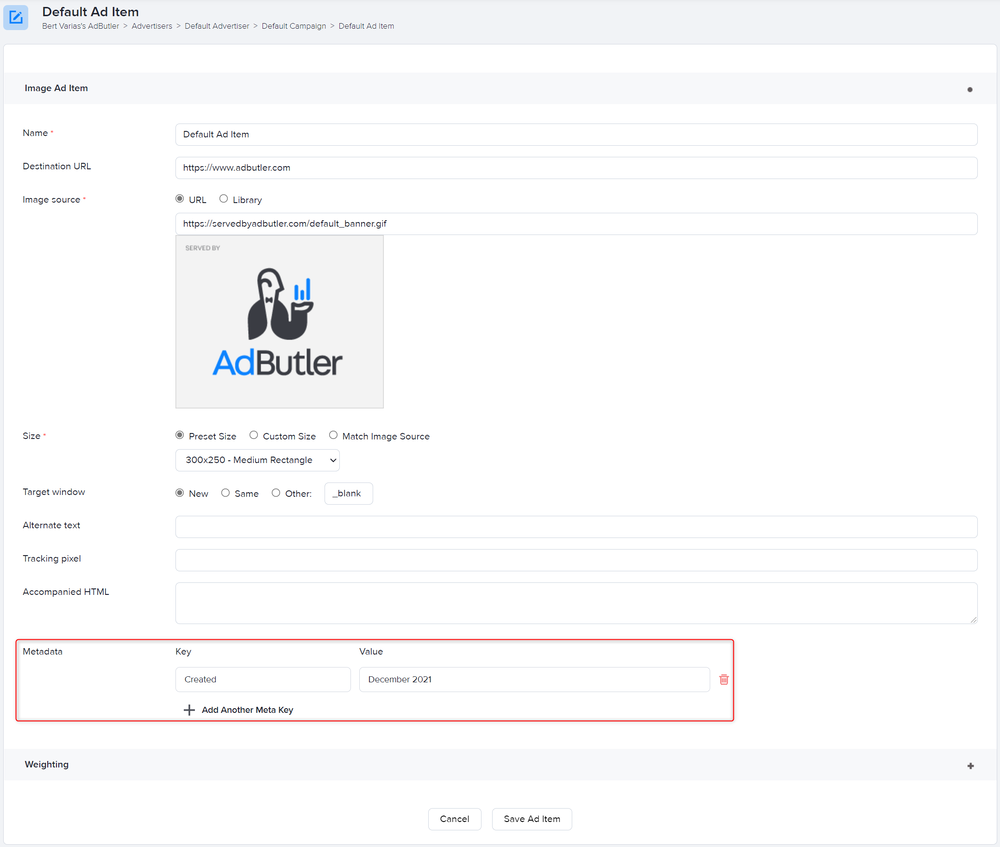
In VAST 2 ad items, the metadata fields are in the Summary tab.
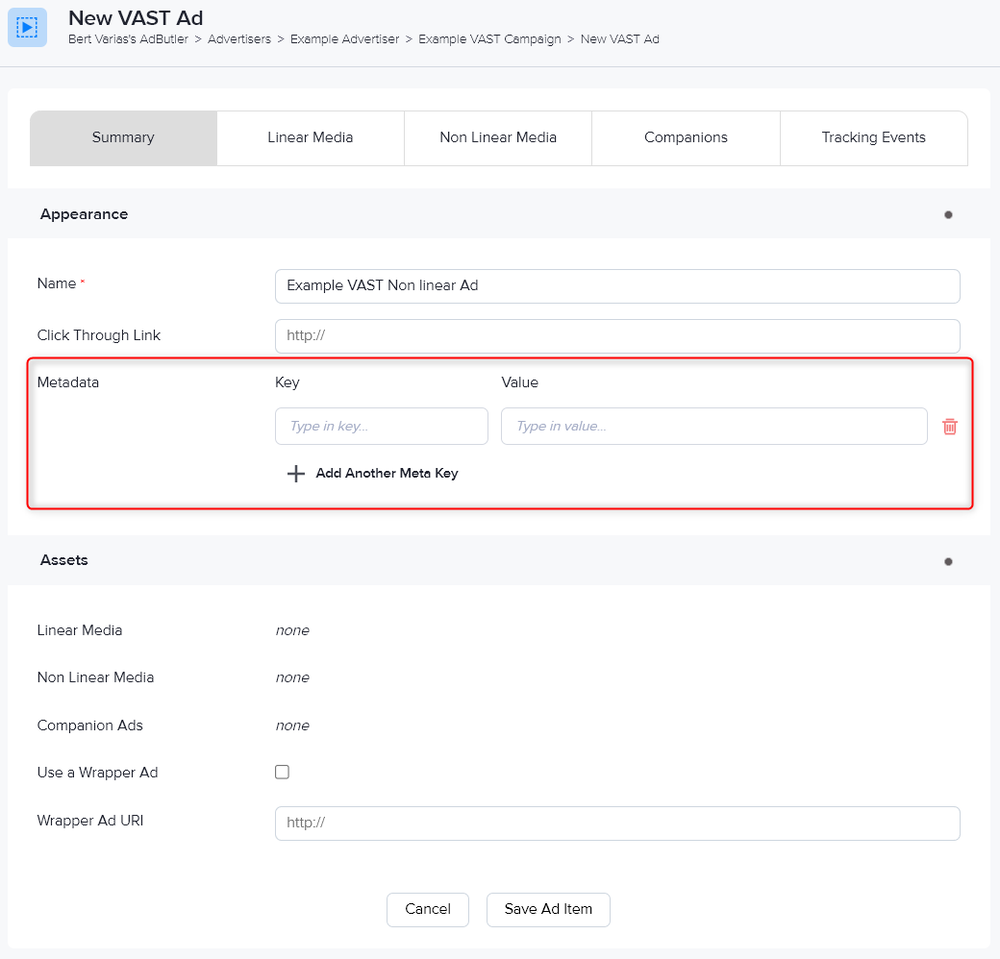
- Click Save Ad Item.
Click on the field of an existing metadata entry to edit it. Click on the trash can icon beside a metadata entry to delete it.
Adding advertiser metadata
- Go to the page of the relevant advertiser (Your AdButler > Advertisers > Your Advertiser).
- Click Edit Advertiser Properties on the right menu. The Edit Advertiser page will appear.
- For the first metadata entry, simply fill in the fields under Metadata. Click Add Another Meta Key to add more entries.
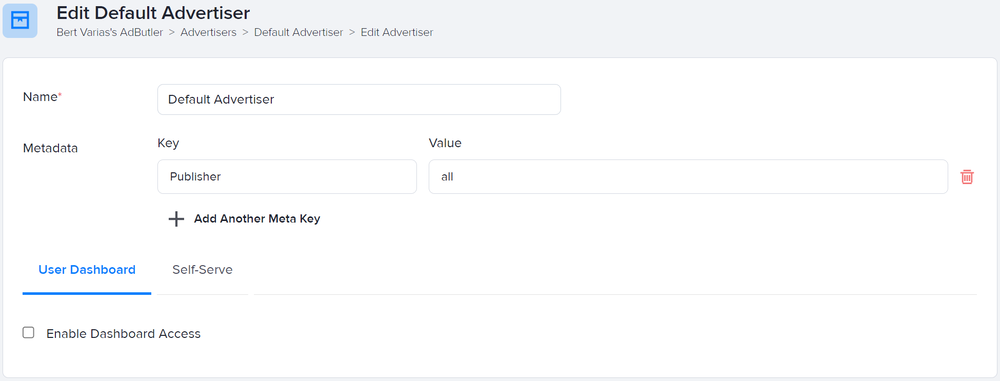
- Click Save this Advertiser.
Click on the field of an existing metadata entry to edit it. Click on the trash can icon beside a metadata entry to delete it.
Adding campaign metadata
- Go to the page of the relevant campaign (Your AdButler > Advertisers > Your Advertiser > Your Campaign ).
- Click Edit Campaign Properties on the right menu. The Edit Campaign window will appear.
- For the first metadata entry, simply fill in the fields under Metadata. Click Add Another Meta Key to add more entries.
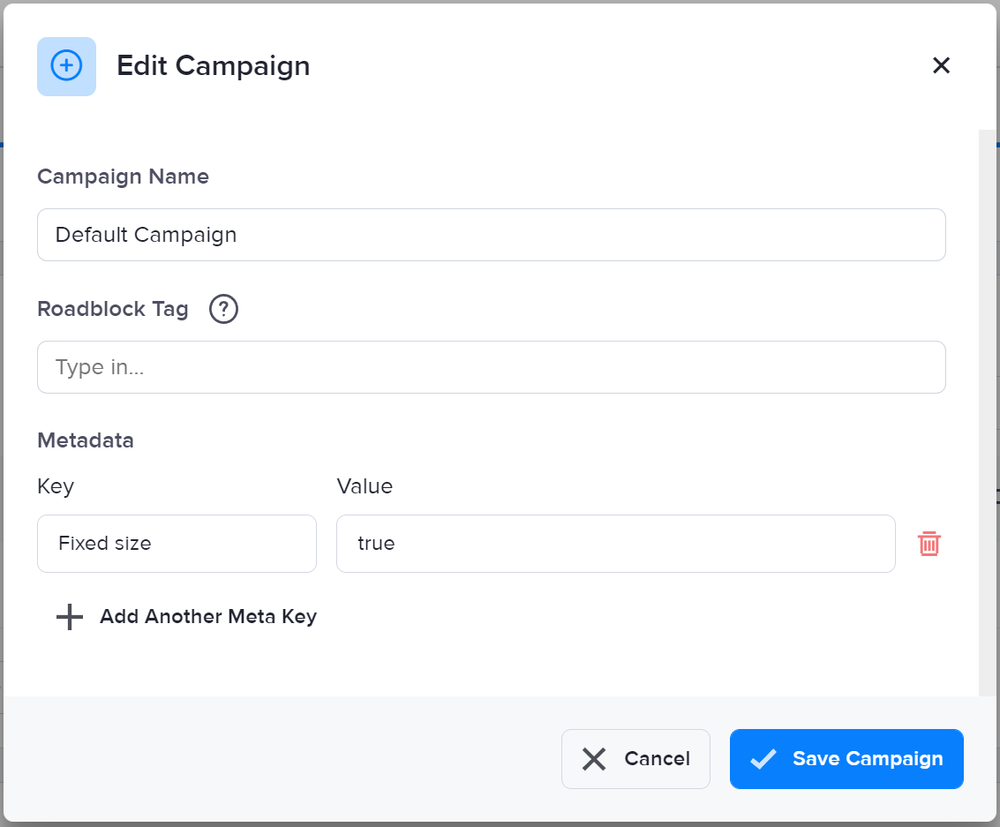
- Click Save Campaign.
Click on the field of an existing metadata entry to edit it. Click on the trash can icon beside a metadata entry to delete it.