How to set up header bidding zones
- About header bidding.
- How to set up header bidding.
- How to create bidders.
- How to assign bidders to header bidding zones.
What is header bidding?
Header bidding allows publishers to automatically sell their inventory to multiple exchanges at once. Before header bidding was implemented, publishers mainly had to resort to the waterfall method, where they would offer their inventory to only one exchange at a time.
Further, with the waterfall method, bidders had to meet only the publisher's minimum price for the impression. This meant that the winning bidder wasn't necessarily the one with the highest offer. But with header bidding, the impression goes to the highest bidder.
While publishers can implement their own header bidding stack, AdButler vastly reduces the time and effort needed to set it up. Using AdButler, not only can a publisher set up header bidding in minutes, they also get real-time reporting, a single location to manage and prioritize bidders, and a single reporting engine to view all bidder statistics such as wins, amounts and response times.
Instead of the commonly used JavaScript zone tags, header bidding zones require the publisher to place a script in the head of their page, as well as a corresponding container on the spot where they want ads to appear.
If your setup would benefit more from using zone tags, consider setting up demand sources and demand endpoints for header bidding.
Setting up header bidding
- Go to the section of the relevant publisher (Your AdButler > Publishers > Your Publisher ).
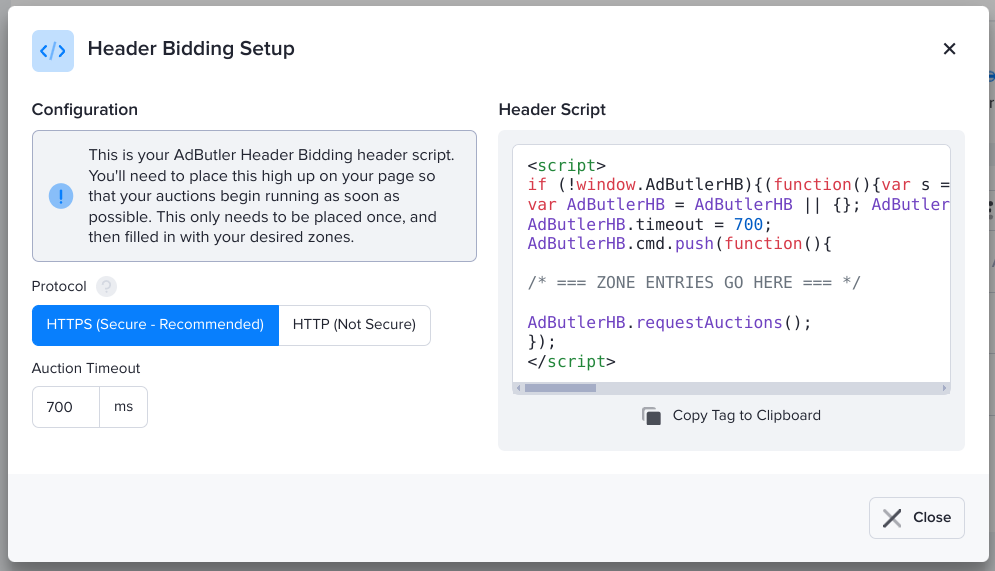
- Click on Others on the top right, then click on Header Bidding Setup. The Header Bidding Setup window will appear.

- Select a protocol and edit the auction timeout as needed.
- Copy the script in the window and place it in a text editor. You will edit it in step 7.
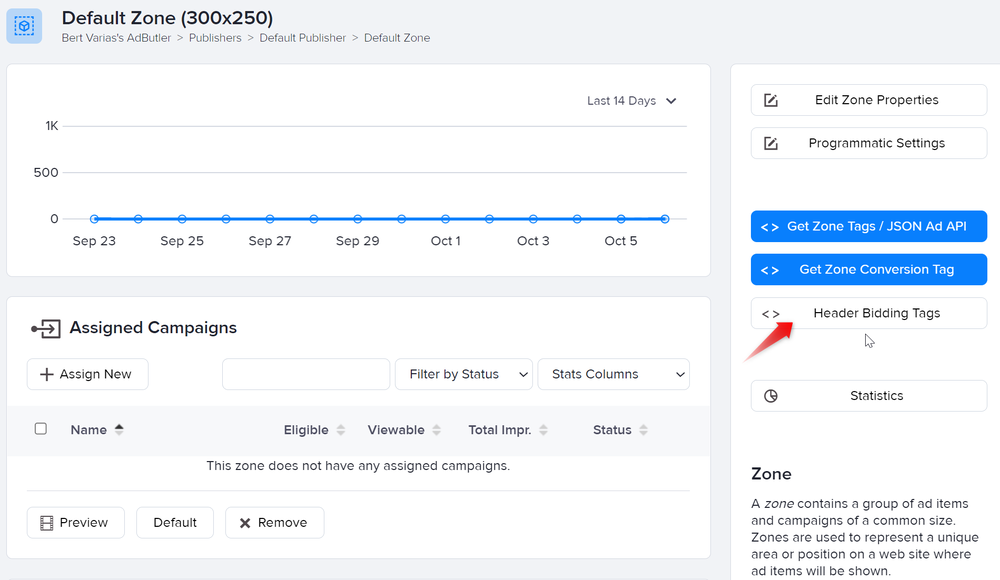
- Go to the section of the zone that you want to use for header bidding (Your AdButler > Publishers > Your Publisher > Your Zone ).
- Click on Header Bidding Tags on the right menu. The Header Bidding Tags window will appear.
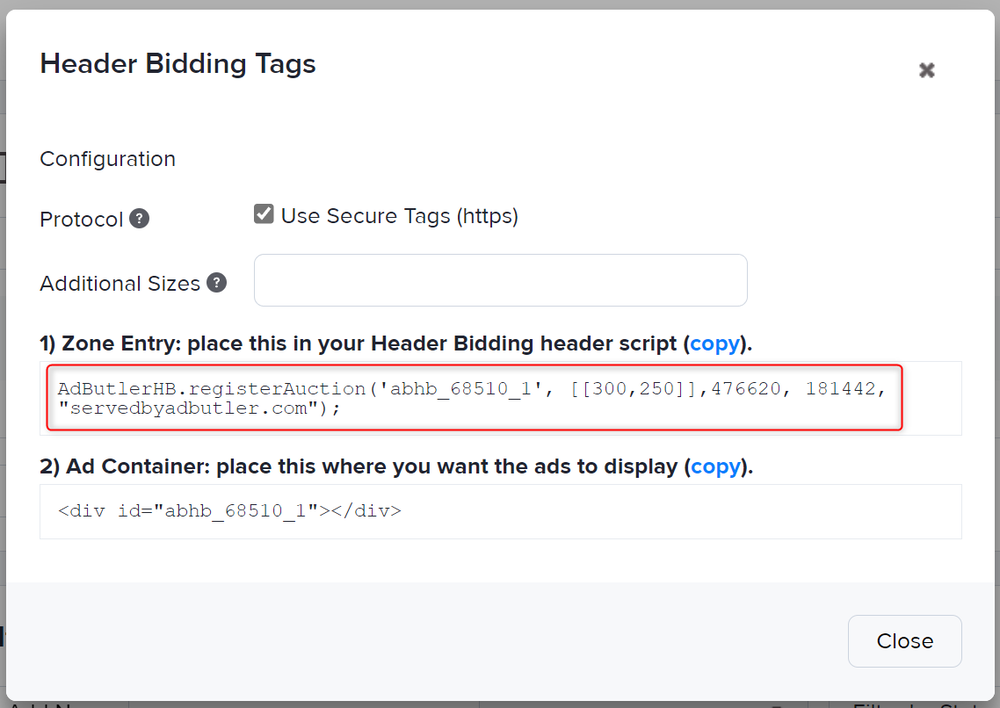
- Copy the code in the Zone Entry field and place it in the spot in the header script where it says
ZONE ENTRIES GO HERE.

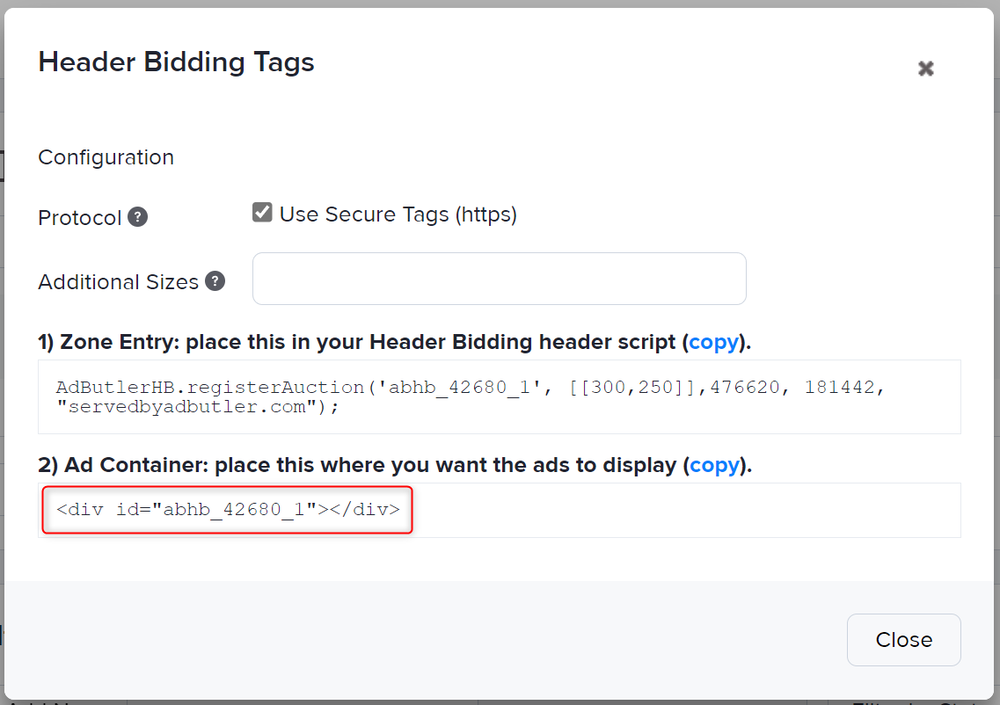
- Go back to the Header Bidding Tags window and copy the ad container. Place this in the spot on the publisher page where you want that zone's ads to appear.
- Repeat steps 4 to 8 for all zones that you want to include in the header bidding setup.
- Paste the complete header bidding header script into the
headof the publisher's page.
Creating bidders
When you've set up header bidding in your zones, you can create and assign ad exchanges as specific bidders to those zones. You must have accounts with these exchanges and they must support Prebid.js so you can add them as bidders. AdButler currently supports Prebid 5.x specifications.
- Click Bidders in the left navigation menu to go to the Bidders section.
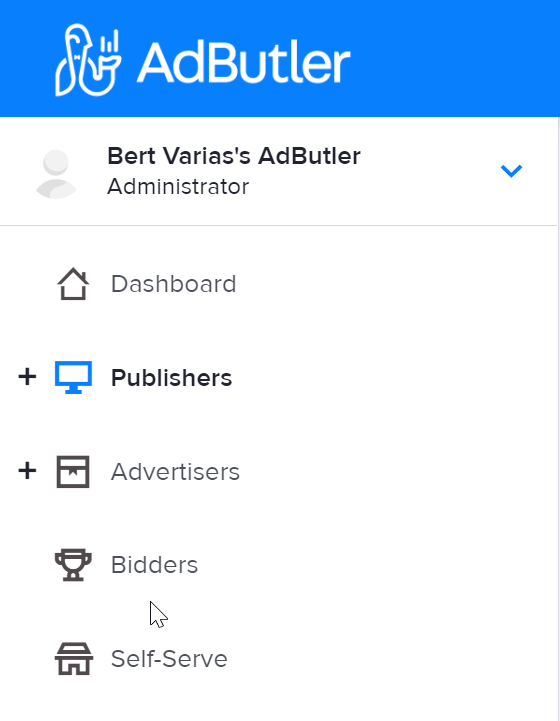
- Click Add New. The New Bidder page will appear.
- Give the bidder a name and enter the bidder code in the appropriate fields.
- Additional fields for the bidder's parameters will appear. Fill in these parameters as needed.

- Click Save. You will be taken back to the Bidders section, with the newly created Bidder added to the section's table.
Assigning bidders
You can start assigning a bidder to a zone from two areas in the AdButler interface:
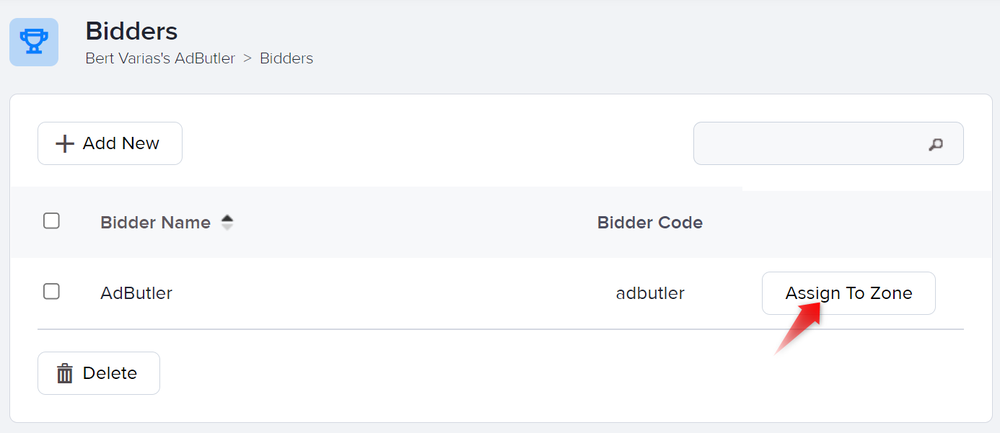
- From the Bidders section, click Assign to Zone then select the zone to which you want to assign the bidder,
- Or, from a zone's section (Your AdButler > Publishers > Your Publisher > Your Zone ), click Assign New under the Header Bidders table then select the bidder that you want to assign to the zone.
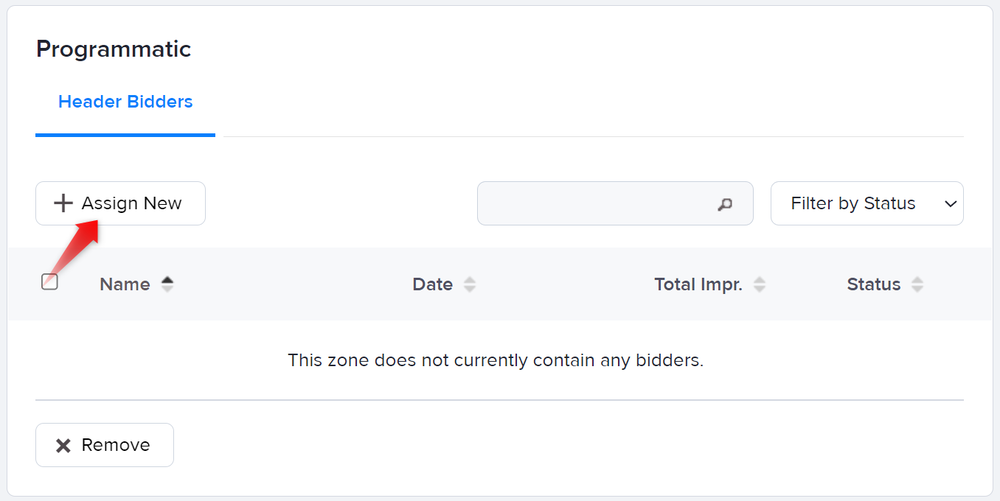
The Assignment page will appear. Fill in the fields as necessary. For more information, read Serve method options, Pacing & Schedule, and Targeting.