How to use the AdButler WordPress Plugin
In this guide, you'll learn:
- How to install the AdButler plugin for Wordpress.
- How to connect your AdButler account to the plugin.
- How to serve ads using the AdButler widget.
- How to serve ads using the shortcode block.
- How to serve interval ads using the AdButler plugin.
Installing the WordPress plugin
- Log into your WordPress Admin page.
- Hover your cursor over Plugins in the left navigation menu then click Add New.
- Type AdButler in the search bar. The AdButler WordPress Plugin will appear in the search result.
- Click Install Now on the search result. The button's label should change to Activate when the plugin is installed.
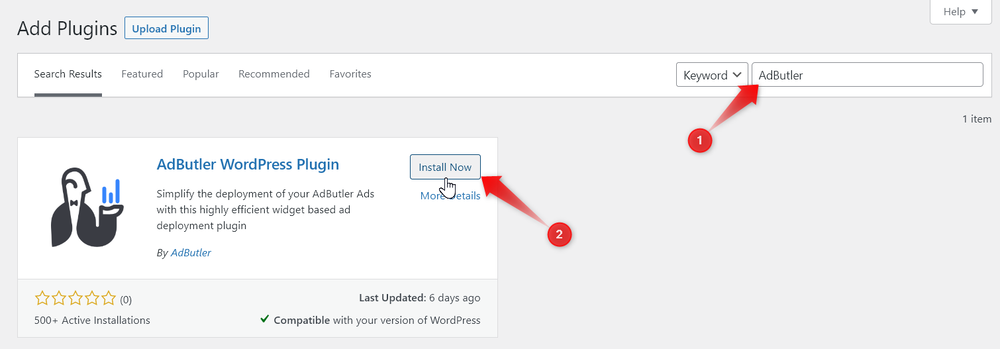
- Click Activate.
You can now connect your AdButler account to the plugin.
Connecting your AdButler account to the plugin
- Log into your AdButler account.
- Click Settings at the bottom of the left navigation menu.
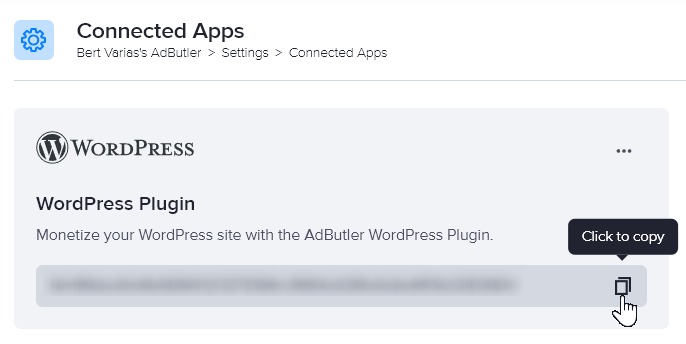
- Click Connected Apps.
- Copy your WordPress key.
- Go back to your WordPress Admin page.
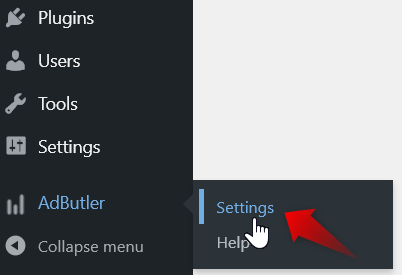
- Hover your cursor over AdButler in the left navigation menu then click Settings. The plugin settings page will appear.
- Paste your WordPress key into the text field at the top then click Save Key.
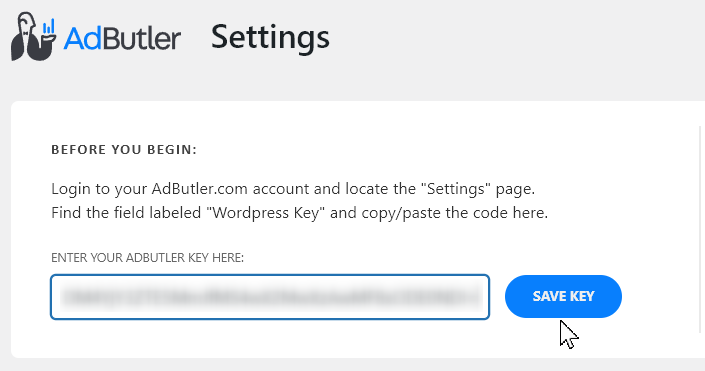
You can now place a zone into your pages or posts.
Serving ads using the AdButler widget
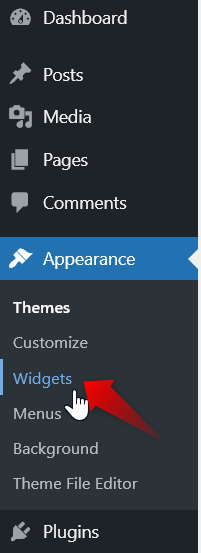
- In your WordPress Admin page, hover your cursor over Appearance in the left navigation menu then click Widgets. The Widgets page will appear.
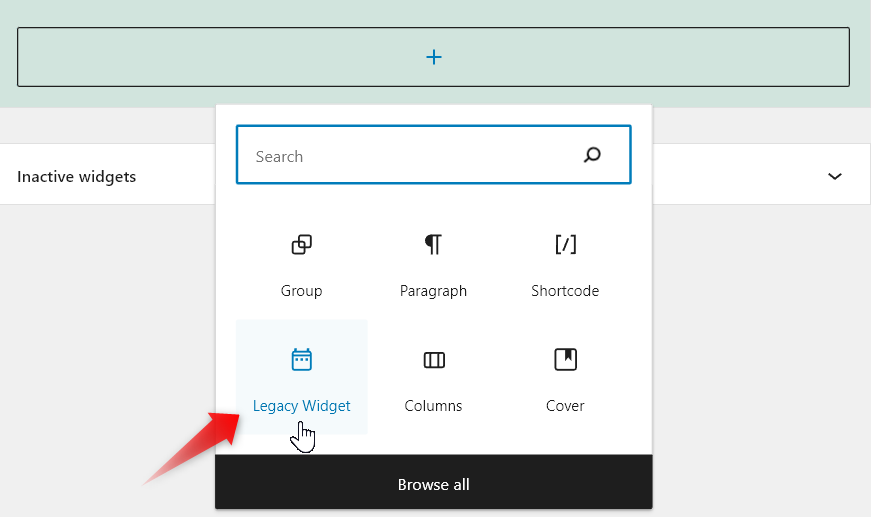
- Click on the + icon under the part of the page where you want the ad to appear. The shortcut menu for blocks will appear.
- Click Legacy Widget.
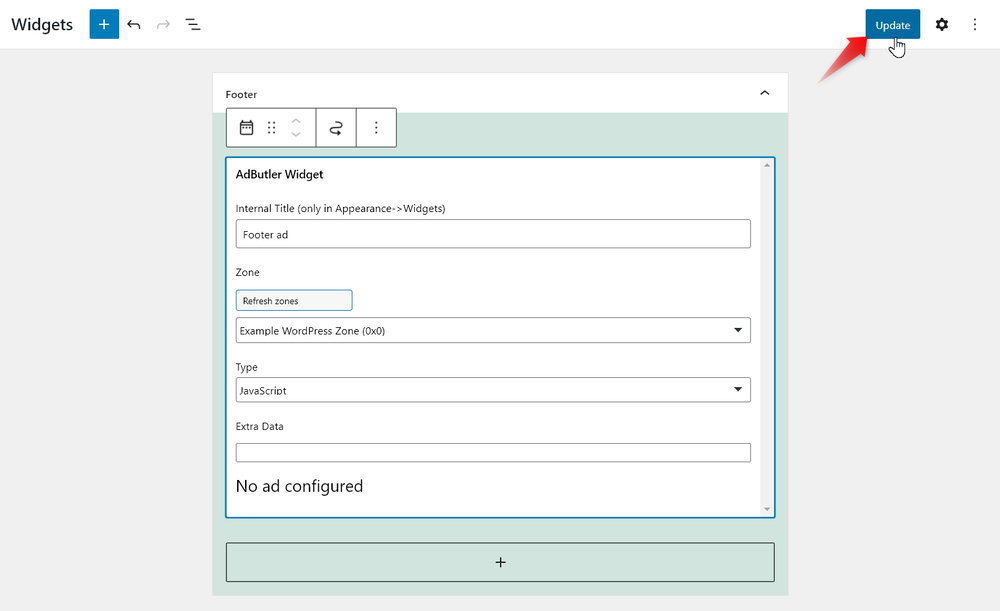
- Click on the Legacy Widget dropdown menu then click AdButler Widget. The widget's settings will appear.
- Enter a name for the widget.
- Select the zone you configured in your AdButler dashboard. You may need to click Refresh Zones for the list of zones to appear.
- Select the zone tag type.
- Add any extra parameters that you want to pass in the Extra Data field.
- Click Update on the top right corner of the page to save the widget.
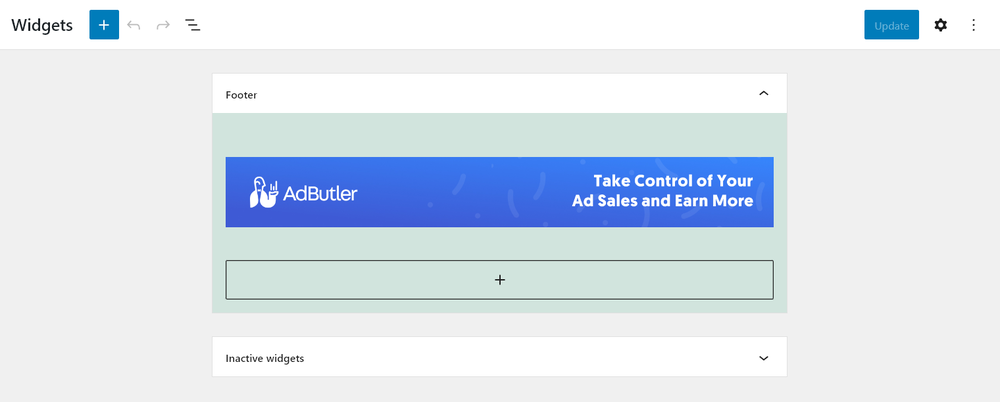
You may need to leave then go back to the Widgets page to see a preview of the ad in the zone you selected.
Serving ads using the shortcode block
- Log into your AdButler account.
- Go to the section of the relevant zone (Your AdButler > Publishers > Your Publisher > Your Zone).
- Copy the zone ID on your browser's address bar.

- In your WordPress Admin page, open the page or post where you want to place ads.
- Click on the + icon under the part of the page where you want the ad to appear. The shortcut menu for blocks will appear.
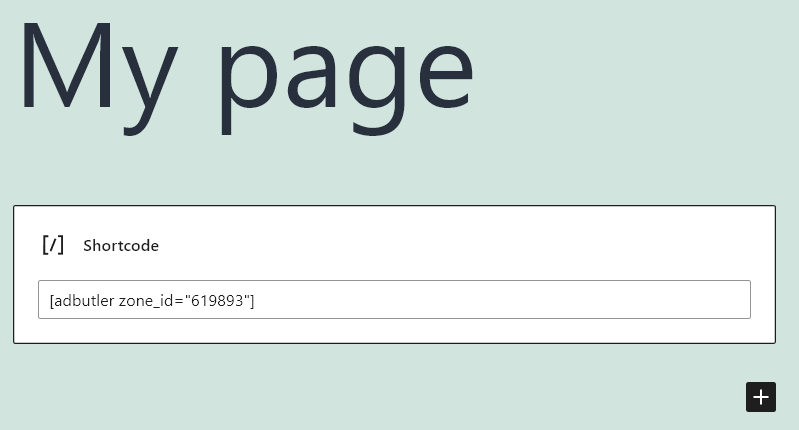
- Click Shortcode.
- Enter the following in the Shortcode text field, replacing 0000 with the zone ID you copied:
[adbutler zone_id="0000"]
To implement header bidding, use the following instead:
[adbutlerhb zone_id="0000"]
type="". Some example types are type="asyncbeta" and type="js". Example: [adbutler zone_id="0000" secure="1" type="asyncbeta"]Save your post or page then preview it to see what the ad will look like.
Showing interval ads using the AdButler plugin
You can also use the AdButler plugin to to display ads between posts on your WordPress site.
- Log into your WordPress Admin page.
- Hover your cursor over AdButler in the left navigation menu then click Settings. The plugin settings page will appear.
- Tick the first checkbox in Display Settings to enable interval ads.
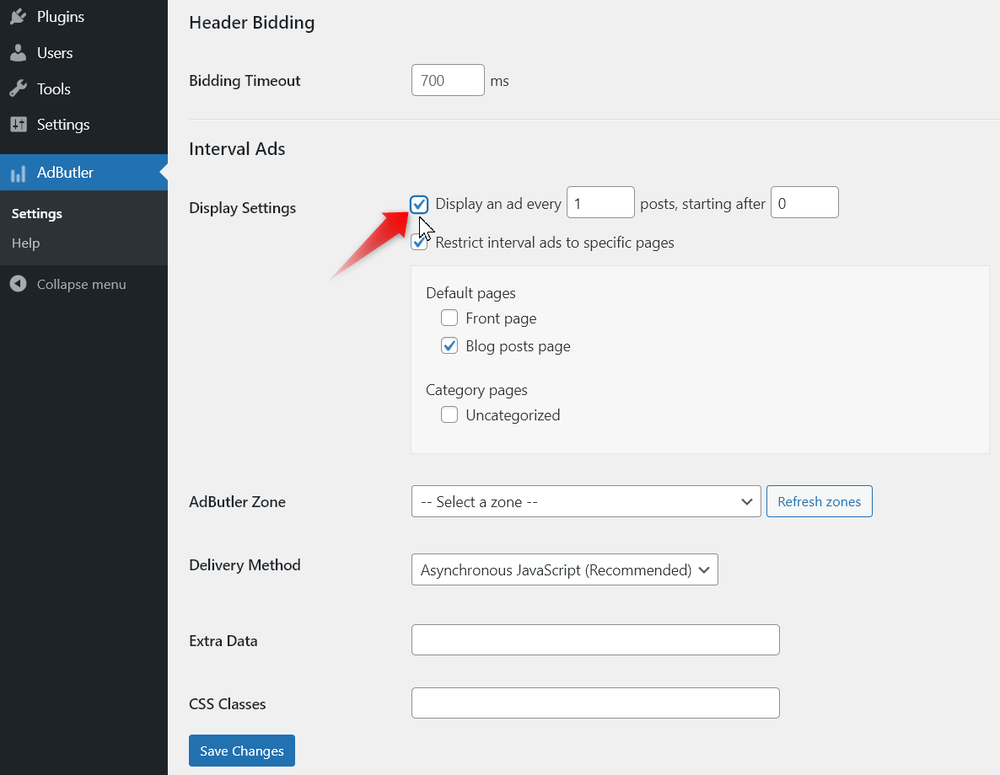
- Configure the rest of the settings as needed, including the relevant zone and the zone tag type.
- Enter a space-separated list of CSS classes to the container HTML tag. (optional)
- Click Save Changes.
You may need to refresh your site to see interval ads being served.