Self-Serve: Creating a new Publisher Portal
This guide assumes that you have already created the publisher and placed the zone tags corresponding to the inventory you want to sell. For more information, read About Publishers.
Creating a new Self-Serve portal
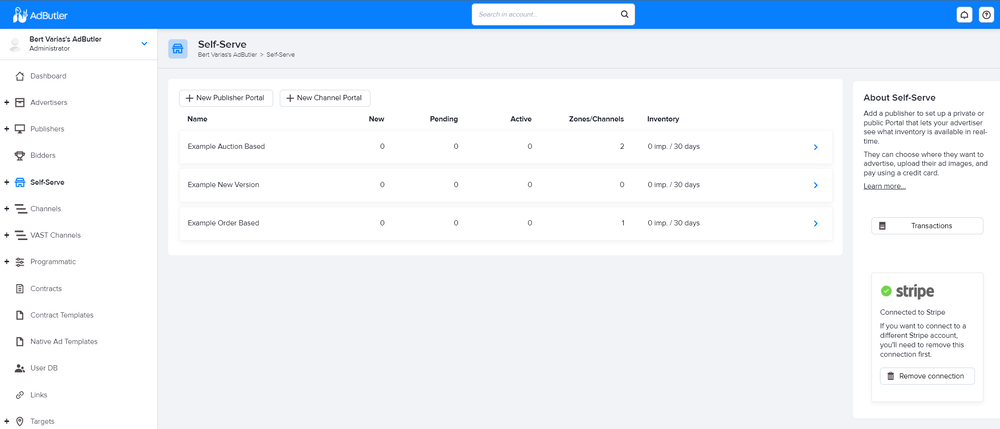
- Click Self-Serve in the left navigation menu to see a list of active portals. This will be empty if you have not yet created any portal.

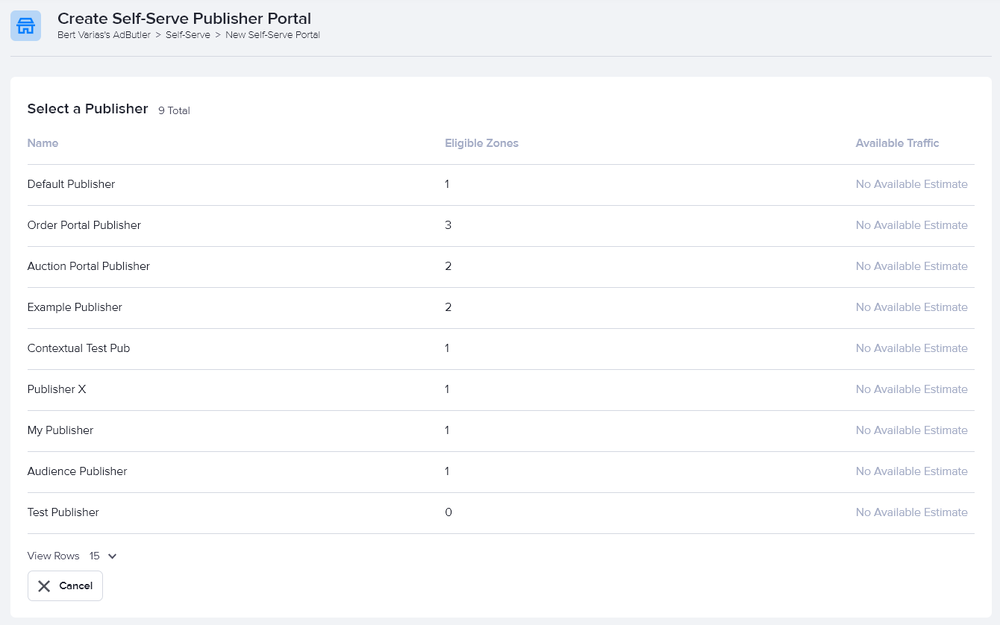
- Click on the New Publisher Portal button to view a list of eligible Publishers and the estimated amount of traffic each zone has available to sell.

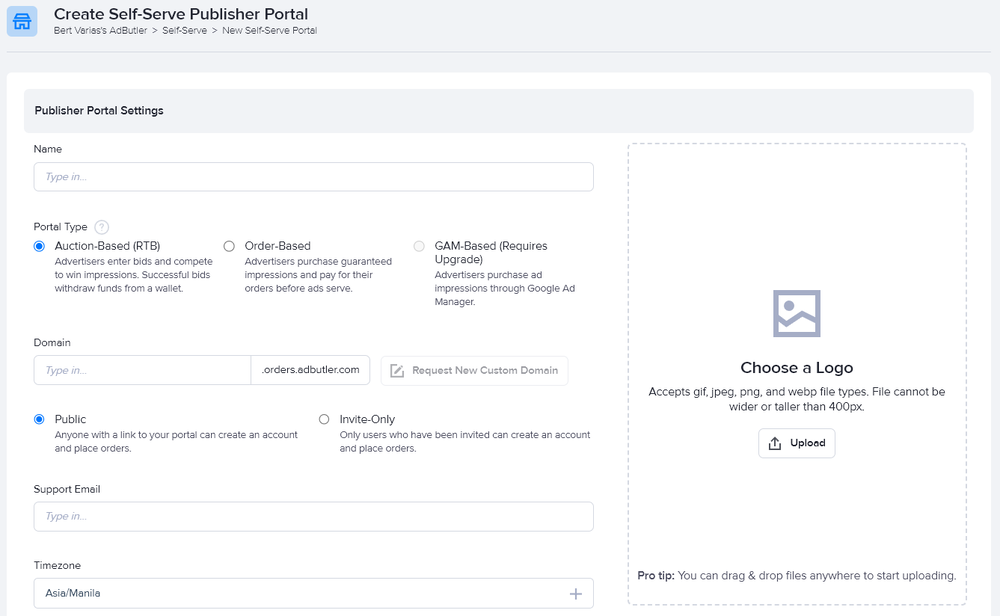
Click on the name of the relevant publisher. The Create Self-Serve Publisher Portal page will appear.
Configure the portal as needed.


- Click Save.
You can still edit a portal's settings after creating it. The section below has details on the settings fields and options.
Portal Settings
Publisher Logo
The image that will be displayed on the top left navigation bar of the portal when your advertisers are logged in. If you leave it blank, only the portal name will be shown. (optional)
Portal Name
The name of the portal that is displayed to advertisers when they are logged in. By default, new portals are given the publisher's name. You can edit this if you want to display something different to your advertisers.
Portal Access
All portals have a domain name for advertisers to access, which is [portalname].orders.adbutler.com. You can enter whatever prefix you want for [portalname], as long as it hasn't already been used by another AdButler account.
You can also choose whether your portal is accessible to the public or invite-only. Public portals allow anyone with the URL to access the portal and create an account to place an order. Invite-only portals require you to manually invite a user via e-mail before they can view your inventory and place orders.
Support E-mail
A valid e-mail address that will be displayed to your advertisers for all support related inquiries. This email will also be used to receive all new order submissions and activity notifications related to orders.
Timezone
The timezone that will be used as the basis for the start and end times of all your orders. By default, this will be set to the same timezone selected in your AdButler Account Settings menu.
Order Settings
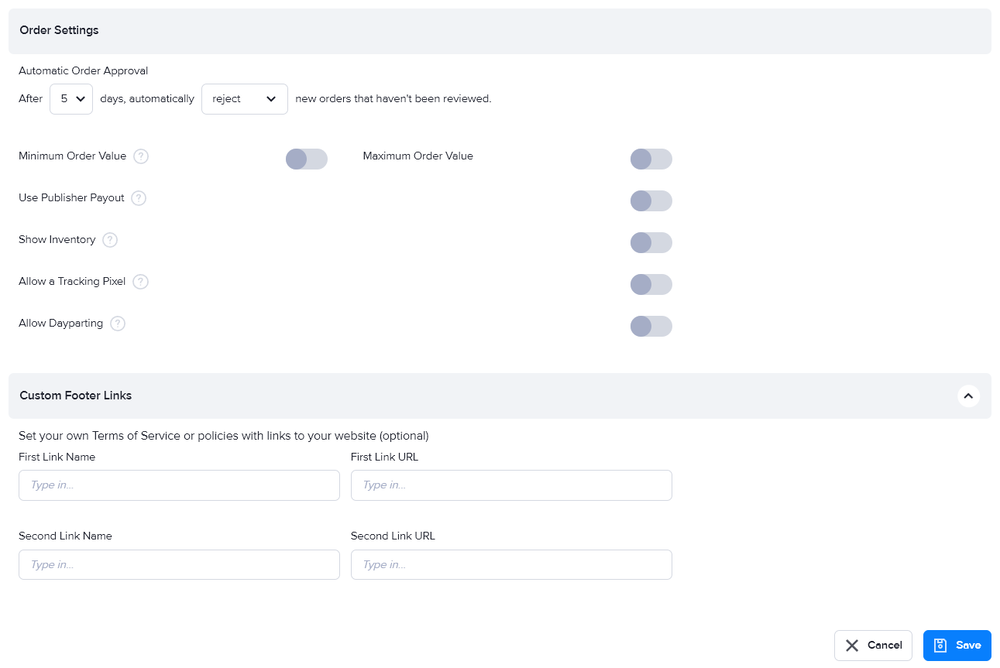
Automatic Order Approval
Whether to automatically approve or reject a new order if it has not been reviewed after a set number of days.
Minimum Order Value
Set the minimum dollar amount allowed for each order. (optional)
Maximum Order Value
Set the maximum dollar amount allowed for each order. (optional)
Use Publisher Payout
Whether or not you can set different publisher payout schemes per zone.
Allow a Tracking Pixel
Whether or not advertisers can place a tracking pixel URL in their orders.
Show Inventory
Whether or not to show the estimated inventory in the portal. Available only for auction-based portals.
Allow Dayparting
Whether or not to allow advertisers to select specific hours of the day to serve. Available only for auction-based portals.
Custom Footer Links
Enter up to two links (e.g. a link to your website, a Terms of Service page, etc.) that will be shown at the bottom of the portal. (optional)
Once you've configured your portal, you can now set up your inventory.