Self-Serve: Advertiser Quick-start Guide
The Self-Serve advertiser portal lets you create, manage, and track the ads that you want to serve with your partner publisher. You can access it using any device that has a modern web browser, including mobile devices.
This guide will teach you the basics of the advertiser portal. If this is your first time using the portal, we highly recommend reading the sections of this guide sequentially.
- About the most commonly used terms in the portal.
- How to configure your payment details and top ups.
- How to create an auction-based campaign.
Self-Serve Terminology
Before you start navigating and using the various sections of your portal, we recommend that you become familiar with the most common terms that you'll encounter in the interface.
Ad Item or Ad - A single advertisement. It consists of a creative, which is the file or zip archive of media that will be displayed, and usually an alternate text or caption as well as a destination URL.
Campaign - A group of ads that share the same schedule and placement (see below). The performance of ads in a campaign are also logged and presented as a group, allowing you to easily view and track their metrics. A campaign can also contain only a single ad. You can add or remove ads to a campaign even after you have created it.
Zone - An advertising space on the publisher's website. Zones usually have restrictions on the dimensions and the type of creative that can be displayed on it. Zones are configured by publishers.
Placement - The advertising slots that you can purchase or bid on. Each placement has a related zone, cost or bid floor, and bidding strategy. Most of the details are configured by the publisher. The only details you can configure are the bidding strategy and the maximum bid (when applicable).
Configuring payment details and adding funds
Adding a payment method
Before creating campaigns for your publisher's approval, set up your payment details so you can fund your campaigns.
Click on the Settings tab. The Settings section will appear.
Click Payments & Automatic Top Ups. The Payments & Automatic Top Ups settings page will appear.
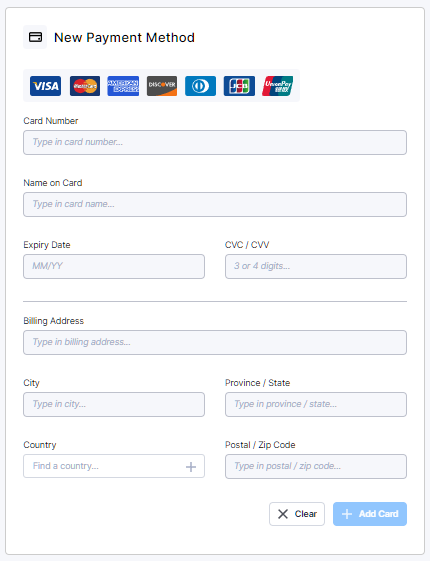
- Under New Payment Method, enter your payment details.
- Click Add Card.
When you've added a payment method, you can add funds to your Self-Serve wallet. You can either set up automatic top ups or manually add funds to your wallet.
Setting up automatic top ups
- Click on the switch beside Automatic Top Ups to make it turn green. The automatic top up options will appear.
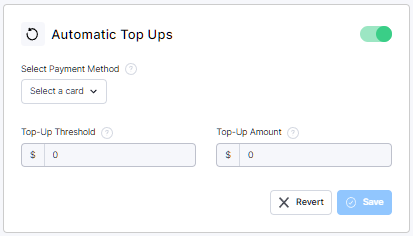
- Select your preferred saved payment method in the dropdown menu.
Set a threshold. When your wallet balance drops to this amount or lower, AdButler will automatically add your preset amount to your wallet.
Set an amount to be automatically deducted from your payment method and added to your wallet whenever its balance hits your preset threshold.
Click Save.
Setting up manual top ups
- Under Manual Top Ups, select your preferred saved payment method in the dropdown menu.
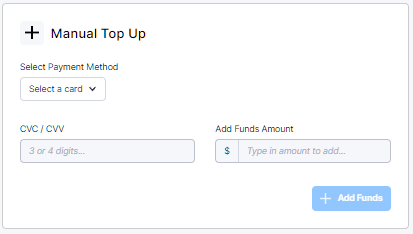
Enter the CVC or CVV of the card.
Enter the amount to be added to your wallet.
Click Add Funds.
Creating an auction-based campaign
In an auction-based setup, you set a daily budget to automatically bid for placements and configure how you want that budget to be spent. The types of ads and targeting options available have all been configured by your publisher.
- Click Create Campaign on the top-right corner of the portal. The campaign creation wizard will appear.
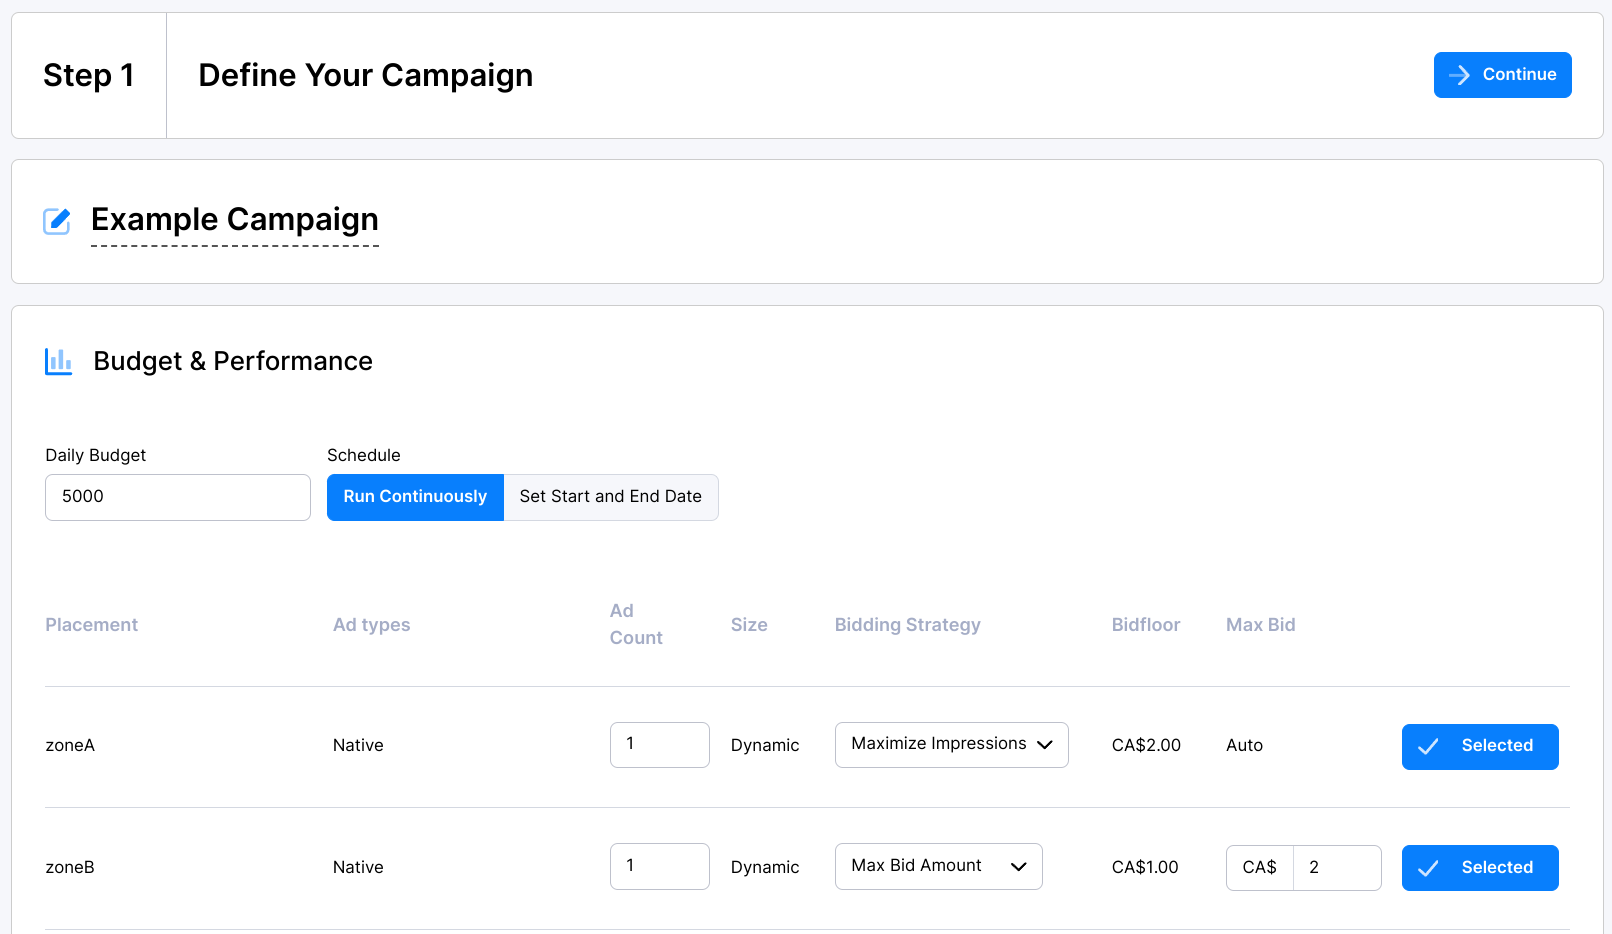
Name the campaign. (optional)
Enter a daily budget.
Choose the campaign's schedule. Run Continuously will make the campaign active indefinitely. Set Start and End Date will make the campaign active only for the period you specify.
Select one or more placements on which to bid. Be sure to select your desired bidding strategy for each placement you select.
- Maximize impressions - Sets your bids to get as many impressions as possible.
- Max bid amount - Limits your bids only up to your desired maximum amount to get the most value out of your daily budget.
Click Continue. You will now add ads to the campaign.
- Click on Unnamed Ad Item to name the ad. The rest of the ad item options will appear.
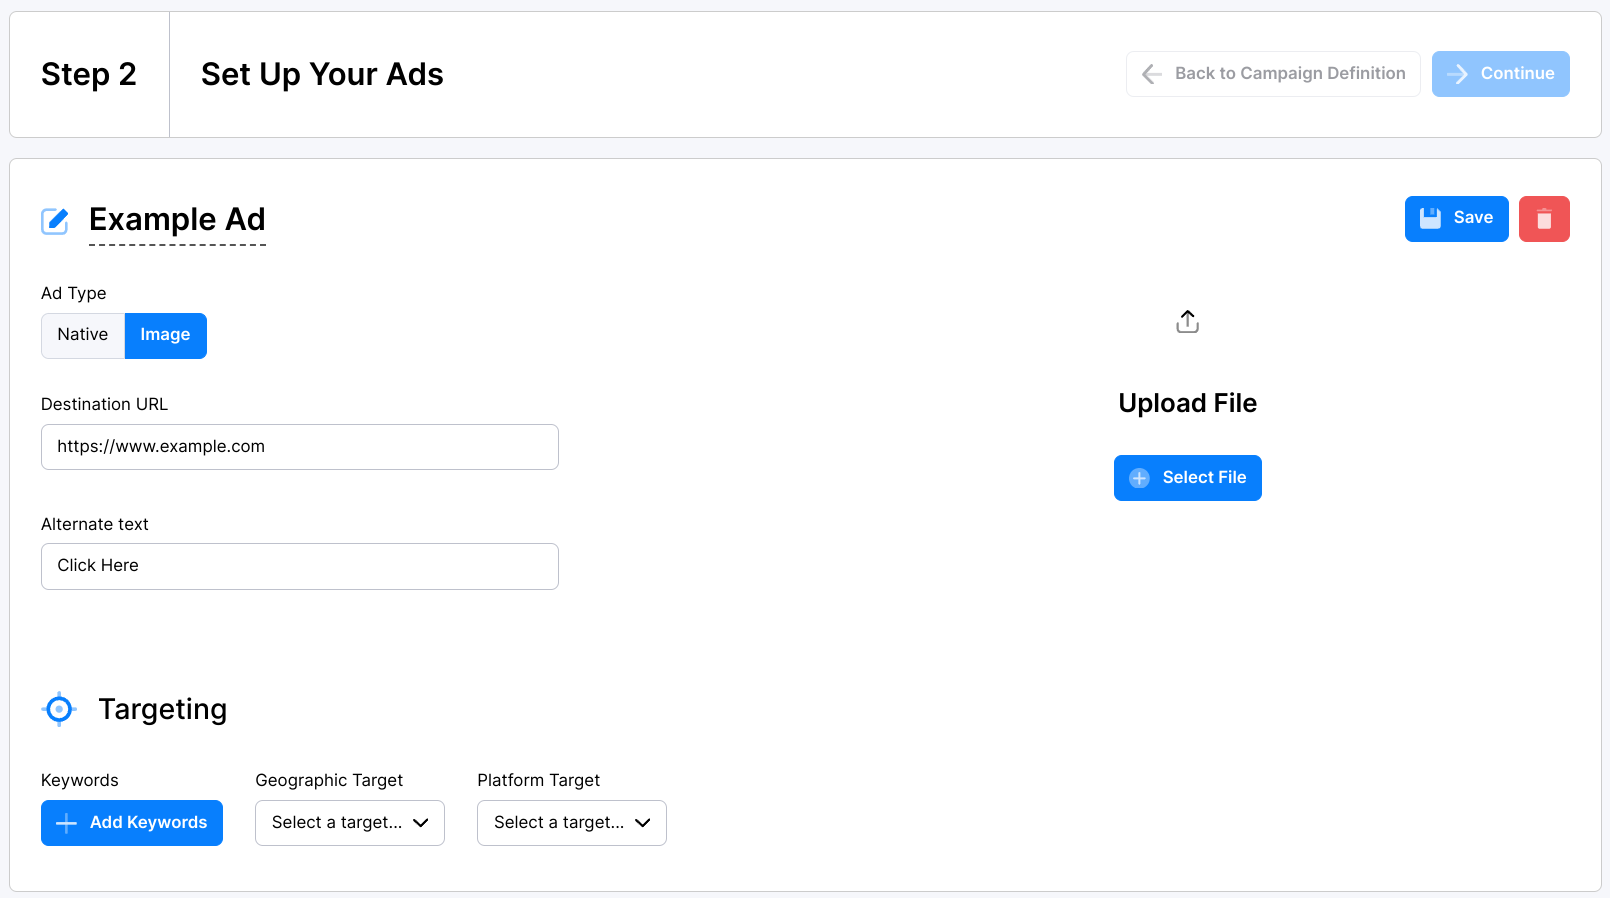
Select an ad type, then click Select File to upload the creative.
Enter the destination URL and alternate text for the ad. (optional)
Specify the targeting parameters for the ad. (optional)
Click Save.
Click Continue when you have finished adding all the ads to the campaign.
Review your campaign then click Submit. You can click Back to Setup Ads if you want to go back to the ad creation section.
Your campaign will start serving once your publisher approves it. By default, you will be notified via email and on your Notification board (the bell icon) on top of the page whenever your publisher approves or declines your campaign.
Keep in mind that your Self-Serve wallet should have enough balance to fund all your campaigns for the durations you configured. Otherwise, any active campaigns will be paused until your wallet has sufficient funds.
After reading this guide, you should be able to create campaigns and submit them to your publisher. But the advertiser portal also has other useful sections, features and options. For more information, read Self-Serve: Advertiser Campaigns section, Self-Serve: Advertiser Reports section, and Self-Serve: Advertiser Notification settings.