Self-Serve: Managing Portal Inventory
Add Zone Inventory
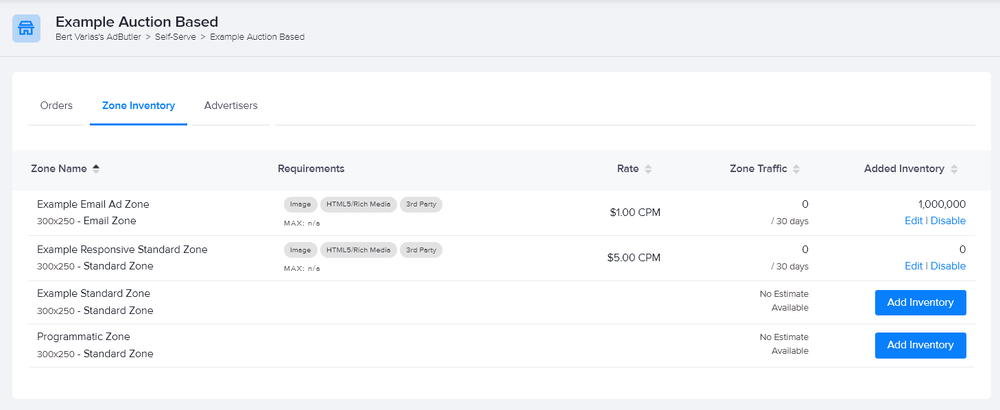
To start adding inventory to your portal, click the "Zone Inventory" tab shown at the top of your portal setup view.

This will show you all of the zones that are eligible to add (currently limited to Standard Zones) as well as an estimate of traffic for each zone.
To add zone inventory click on the "Add Inventory" button in the row of the zone you want to add.
Zone Inventory Settings
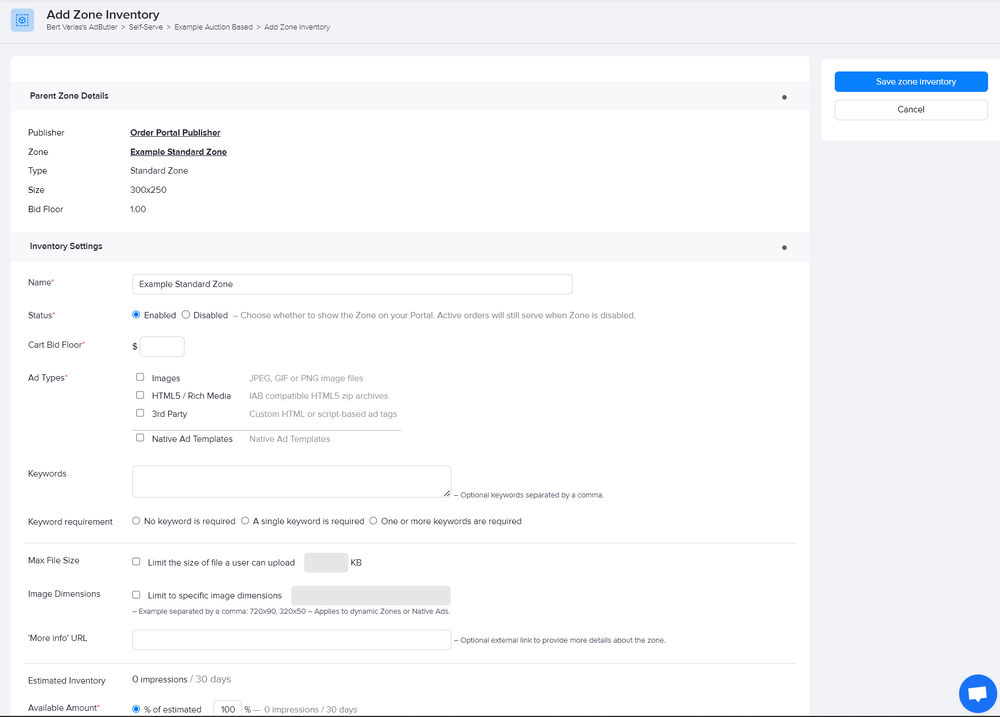
On the "Add Zone Inventory" screen you will see a summary of the zone details, followed by the inventory settings.

Name
By default this is the name of the zone. You can however change this to any name you'd like if you want to display something different in your portal. It helps to use a name that will help give advertisers some understanding of where this zone is displayed on your site.
CPM Rate
This is the cost per thousand impressions that you charge to display ads in this zone.
Ad Types
Choose which kind of ad you want to allow your advertisers to display. If you choose more than one, advertisers can select which type of ad to upload when placing their orders.
Max. File Size
Enter a maximum file size to be uploaded for Image and HTML ads.
Estimated Inventory
This will show you how many impressions you have to sell every 30 days. In order to generate this estimate, you need to have your zone tags in place on the pages they are going to be serving ads to. They don't need to be serving any ads just yet, they just need to load each time a user visits the page so that we can poll the amount of traffic. We recommend letting your zone tags sit on your active pages for at least a week to start generating a reasonably accurate estimate.
Available Amount
You can set a percentage of estimated inventory or a flat amount to make available. If you enter a flat amount of impressions manually, be sure to only enter an amount that you are sure will be available to fill your orders.
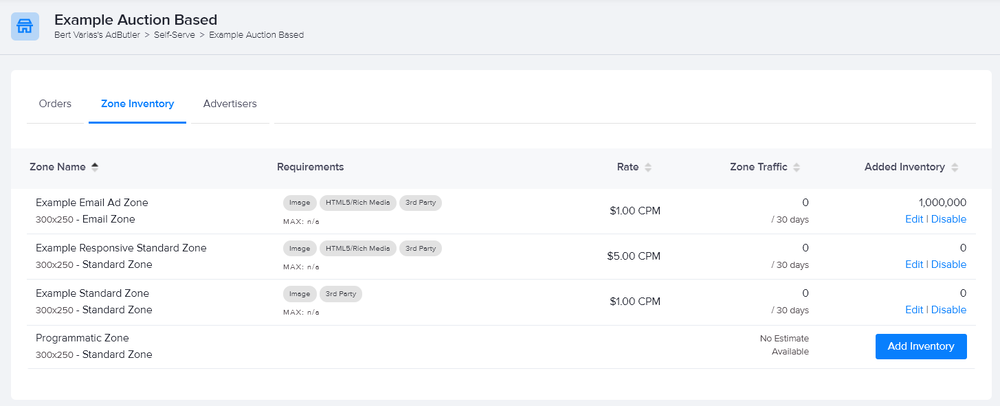
Once you are done setting up a zone, click "Save zone inventory" at the top right of the zone inventory settings screen. You will see the new inventory you've added displayed in place of the "Add Inventory" button, with links to either "Edit" or "Remove" the inventory from your portal.

To add additional zones, repeat this process for each zone you would like to make available for purchase.