Audiences
An Audience target is a set of targeting filters based on a User Database, or User DB for short. A User DB is a set of attributes that are based on actual user information.
Once you've uploaded and configured a user DB, you can create Audiences out of it. You can then apply the Audience to as a targeting filter for campaign and ad item assignments.
The Audience subsection only lets you create and edit audience targets. Go to User DB to configure and update User DBs.
In this guide, you will learn:
Creating an Audience
- Go to the Audiences section under Targets (Your AdButler > Targets > Audiences).
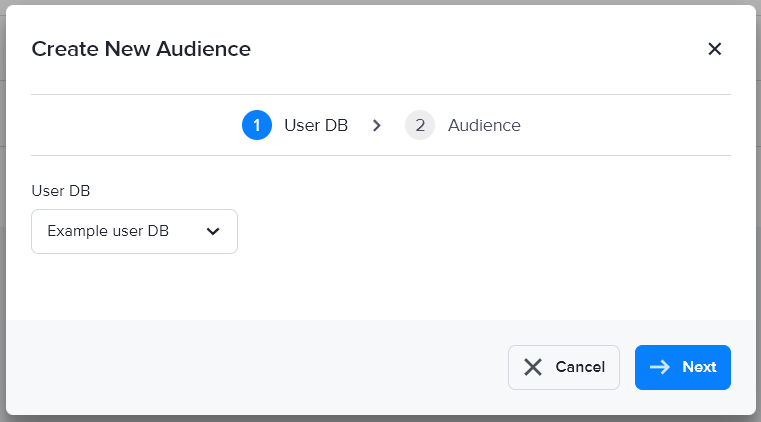
- Click Add New. The Create New Audience window will appear.
- Select the User DB that you want to use.

- Click Next.
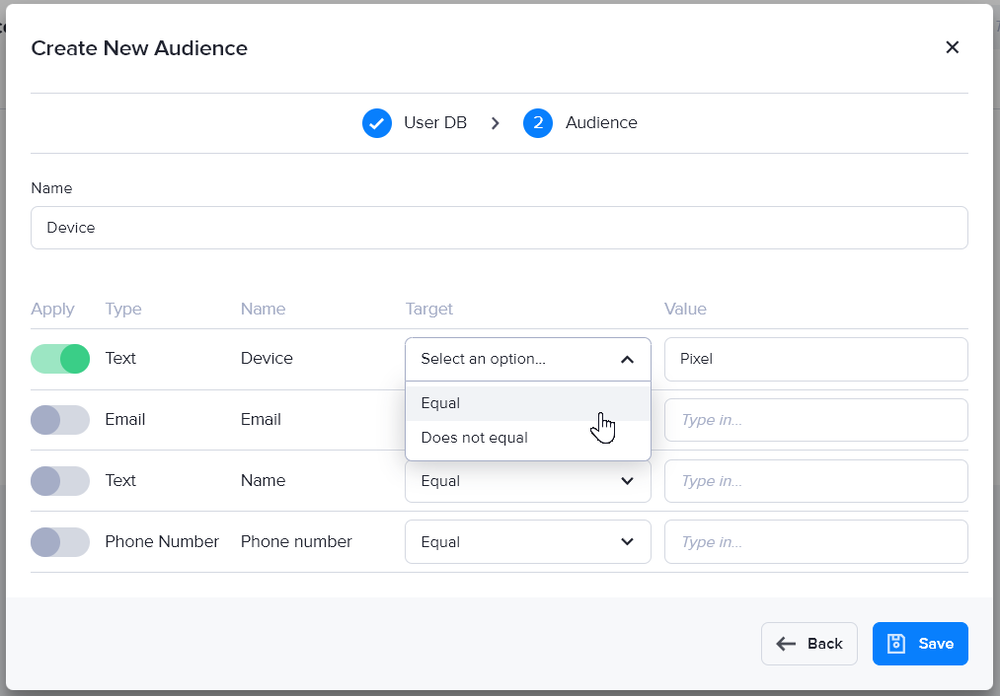
- Enter a name for the Audience.

- Click the switch at the far left of an attribute to apply that attribute in the target. You can use multiple attributes in one target.
- Under Target, specify if the value should be equal or not equal to the target value.
- Enter the target value of each applied attribute.
- Click Save.
Editing an Audience
- Go to the Audiences section under Targets (Your AdButler > Targets > Audiences).
- Hover your cursor over the Edit/Delete column of the relevant Audience to reveal the ... icon.

- Click on the icon then click Edit or Remove as needed.
- Click Save after editing.
Using an Audience
Step 1: Assign the User DB to a publisher
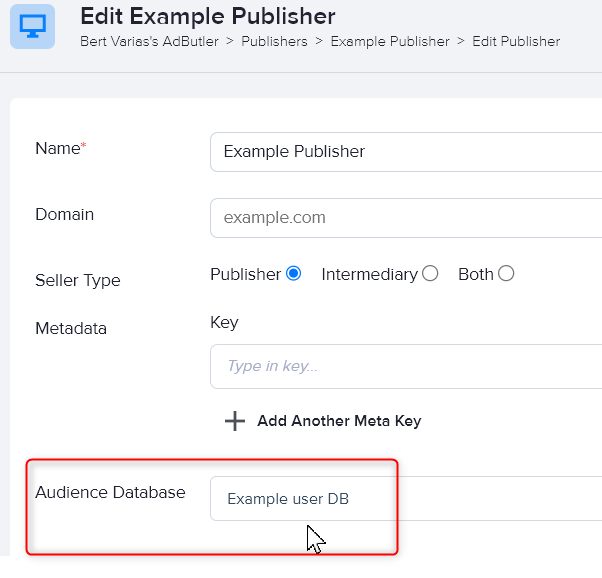
Before you can apply an Audience, you will have to assign its User DB to the relevant publisher. You will need to do this step only once per publisher, unless of course you want to switch databases.
- Go to the section of the relevant publisher (Your AdButler > Publishers > Your Publisher).
- Click Edit Publisher Properties in the right menu. The Edit Publisher page will appear.
- Under Audience Database, select the User DB that you want to use.

- Click Save Publisher.
Step 2: Assign the Audience to a campaign
- Go to the section of the relevant zone (Your AdButler > Publishers > Your Publisher > Your Zone).
- Under the Assigned Campaigns table, click **Assign Campaign to Zone*. The list of eligible campaigns will appear.
- Click on the relevant campaign. The Assignment details page will appear.
- Select your desired serve method.
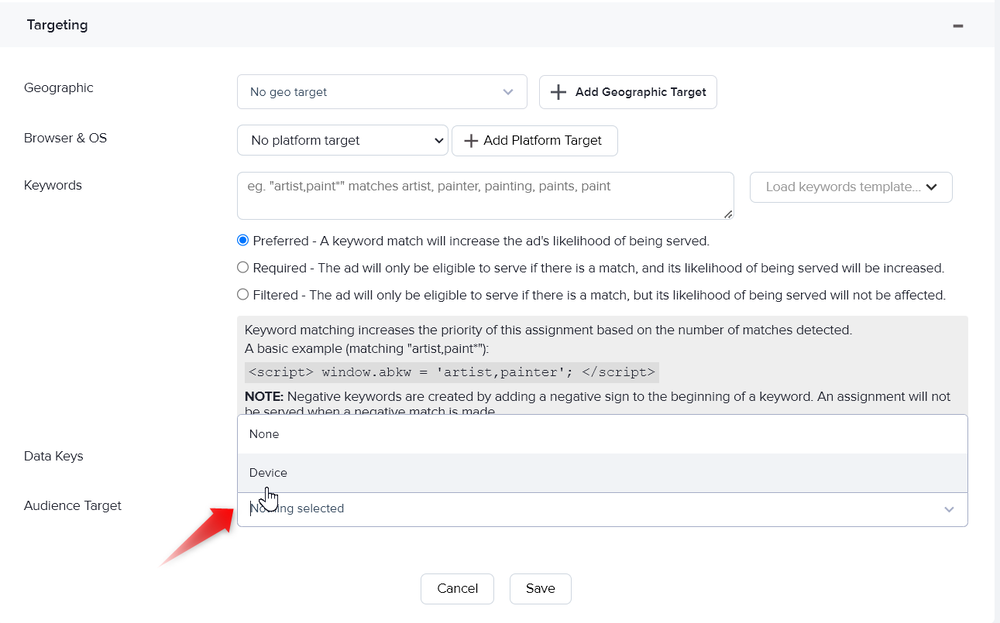
- Click on Targeting to expand its section.
- Under Audience Target, select the Audience that you want to use.

- Configure the other assignment details as needed.
- Click Save.
Step 3: Pass the unique user identifier
Once you've configured the campaign, you can directly pass the unique user identifier whose attributes you want to use through an asynchronous JavaScript zone tag using the parameter custom: { udb_uid: 'your-user-id' }, where udb_uid is the unique user identifier. For example:
<!-- Example Zone [async] -->
<script type="text/javascript">if (!window.AdButler){(function(){var s = document.createElement("script"); s.async = true; s.type = "text/javascript";s.src = 'https://servedbyadbutler.com/app.js';var n = document.getElementsByTagName("script")[0]; n.parentNode.insertBefore(s, n);}());}</script>
<script type="text/javascript">
var AdButler = AdButler || {}; AdButler.ads = AdButler.ads || [];
var abkw = window.abkw || '';
var plc556378 = window.plc556378 || 0;
document.write('<'+'div id="placement_556378_'+plc556378+'"></'+'div>');
AdButler.ads.push({handler: function(opt){ AdButler.register(181442, 556378, [300,250], 'placement_556378_'+opt.place, opt); }, opt: { place: plc556378++, keywords: abkw, domain: 'servedbyadbutler.com', click:'CLICK_MACRO_PLACEHOLDER', custom: { udb_uid: 'your-user-id' } }});
</script>
Using Audiences with cookies
If you're directly passing the unique user identifier, you don't need to configure anything else once you've assigned an Audience to a campaign.
But if you're going to use cookies to identify users and sync your User DB, perhaps in your login page, you must add the following tag to the page:
<img src="https://servedbyadbutler.com/adserve/usync?id=PRODUCT_ID&db=USER_DB_ID&uid=YOUR_USER_ID"/>
PRODUCT_ID is your AdButler account ID. USER_DB_ID is the identifier of the User DB, which you can obtain either from our API or by looking at the value of audienceTargetID in your browser's address bar when you're at that user database's page in the AdButler web app.

Finally, YOUR_USER_ID is the unique identifier for that user as indicated in your user database.
Note that cookie syncing isn't as fast, secure, or reliable as directly passing user IDs. Your results may be suboptimal if you implement audience targets this way.