Postal code targeting
Targeting is an optional add-on to your AdButler subscription. For more information on adding add-ons, read How to change your subscription.
Targets let you show different ads in the same zone for different users or pages in the publisher's site. With postal code targeting you can serve an assigned campaign only for viewers in certain locations based on their postal code or zip code.
This guide will show you how to use postal code targeting. For other forms of targeting, read Targeting overview. To find out how to set schedules and target dates, days, or periods, read Pacing & Schedule.
You will learn:
- How to create postal code targets in the Targets section.
- How to create postal code targets in the assignment page.
- How to assign an existing postal code target.
Note that, when creating targets for postal codes in the British Commonwealth, only the outward code is supported. Thus, V8W 1T6 would be entered as V8W, without the space or secondary "inward code" portion.
Creating a postal code target in the Targets section
- Click Targets on the left navigation menu.
- Click Manage Postal Code Targets. The table of geographic targets will appear.
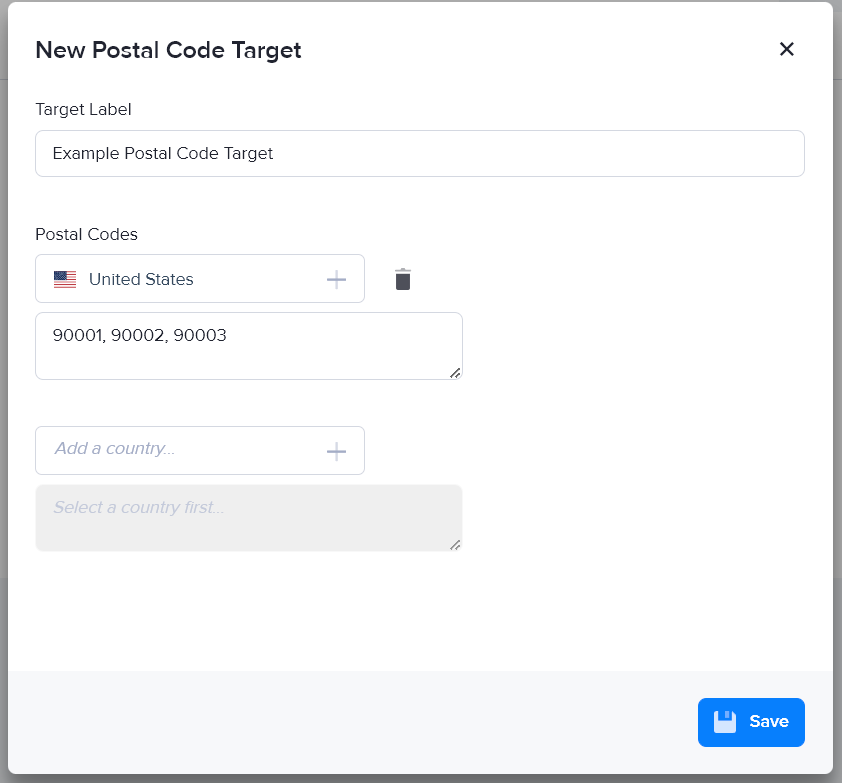
- Click Add New. The New Postal Code Target window will appear.

- Give the target a name.
- Select a country.
- Enter the zip codes you wish to target, separated by commas.
- Click Save. The target you created will appear in the table of postal code targets.
Creating a postal code target in the assignment page
- Go to the relevant campaign's dashboard (Advertisers > Your Advertiser > Your Campaign).
- Click Assign to Zone on the top right of the Zone Assignments table. A list of eligible zones will appear.
- Select a zone to which the campaign will be assigned. The Assignment Details page will appear.
- Select a serve method. The rest of the settings will appear.
- Set the initial settings as needed, then scroll down to the bottom of the page. Click Targeting to expand its settings.

- Click +Add Postal Code Target to the right of the Postal Code dropdown menu. The New Postal Code Target window will appear.

- Give the target a name.
- Select a country.
- Enter the zip codes you wish to target, separated by commas.
- Click Save.
Assigning a postal code target
- Go to the relevant campaign's dashboard (Advertisers > Your Advertiser > Your Campaign).
- Click Assign to Zone on the top right of the Zone Assignments table. A list of eligible zones will appear.
To edit the targeting options of an existing assignment, click on the name of the zone where the campaign is already assigned.
- Select a zone to which the campaign will be assigned. The Assignment Details page will appear.
- Select a serve method. The rest of the settings will appear.
- Set the initial asssignment settings as needed.
For new VAST ad items, click on the Scheduling tab to see the serve method and targeting settings.
- Scroll down to the bottom of the assignment settings then click Targeting to expand the targeting settings.

- Select a postal code target from the Postal Code dropdown menu.
- Continue configuring the assignment.
- Click Save at the bottom of the page.