Native ad template overview
Native ads are ads that often look like editorial content. For example, a native ad on a blog looks like the other articles on the site, a native ad on Instagram is just like an Instagram post, and a native ad on a search engine looks like other search results. Native ads are also known as sponsored content or promoted posts.
You will learn:
- About native ad templates.
- How to create native ad templates.
- The types of variables you can add to a native ad template.
- The requirements for creating native ad items.
- How to create native ad items.
About native ad templates
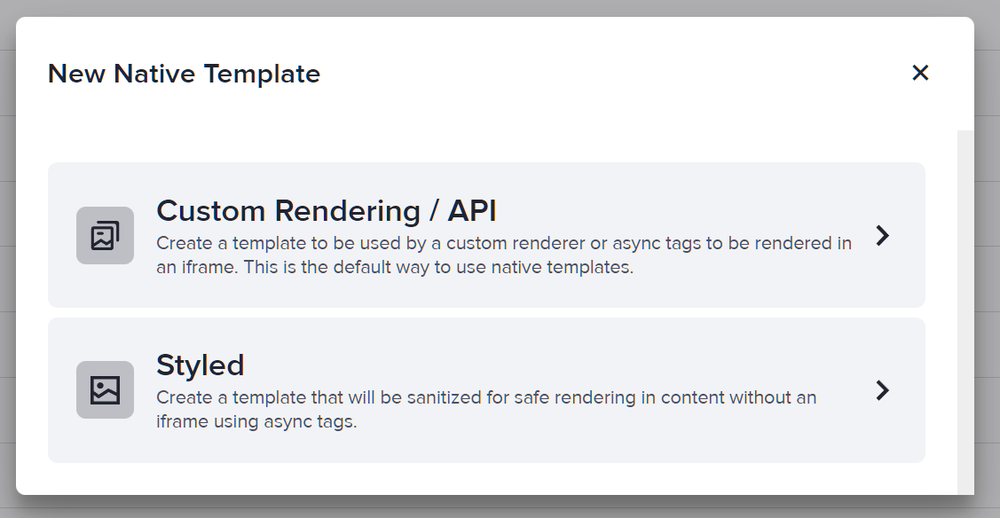
Native ad templates are reusable pieces of code that define the appearance and behavior of a native ad. You cannot create a native ad item without applying a native ad template on the New Ad Item page.
There are two types of native ad templates. Custom rendering/API templates can contain HTML, JavaScript and CSS code. As their name implies, these templates can be used only to create custom rendering/API native ad items (or custom native ad items for short). When assigned to a Native zone, custom native ad items are wrapped in an iframe. But when assigned to a Standard zone, custom native ad items are not wrapped in an iframe to allow for more dynamic forms and behavior.
However, allowing JavaScript and CSS to affect the rest of the page poses a security risk. Malicious actors can execute code or steal data through vulnerabilities in JavaScript and CSS. While most custom native ad items can be placed in both Native and Standard zones, there are some custom native ad items whose templates need to affect the rest of the page to display the ad properly. Such custom native ad items can be assigned only to Standard zones, which means they will not be isolated in an iframe.
Styled templates on the other hand cannot contain JavaScript and CSS, only HTML. In turn, they can be used only to create styled native ad items. These ad items can be assigned only to Native zones. They don't pose a security hazard, but you must add the necessary JavaScript and CSS directly on the website to properly display a styled native ad item.
How to create native ad templates
Use the steps and sample code below to get to know the native ad template creator and its variables.
- Click Templates in the left navigation menu. The Templates section will appear.
- Click Native Ad Templates. The Native Ad Templates subsection will appear.
- Click Add Native Ad Template in the Native Ad Templates table. The New Native Template window will appear.
- Select the type of native template that you want to create. To follow this guide, select Custom Rendering/API. The New Native Ad Template page will appear.
- Name your template then add the variables as needed. To follow this guide, add an image tag and two text variables to the template, and name them as shown in the image in step 5.
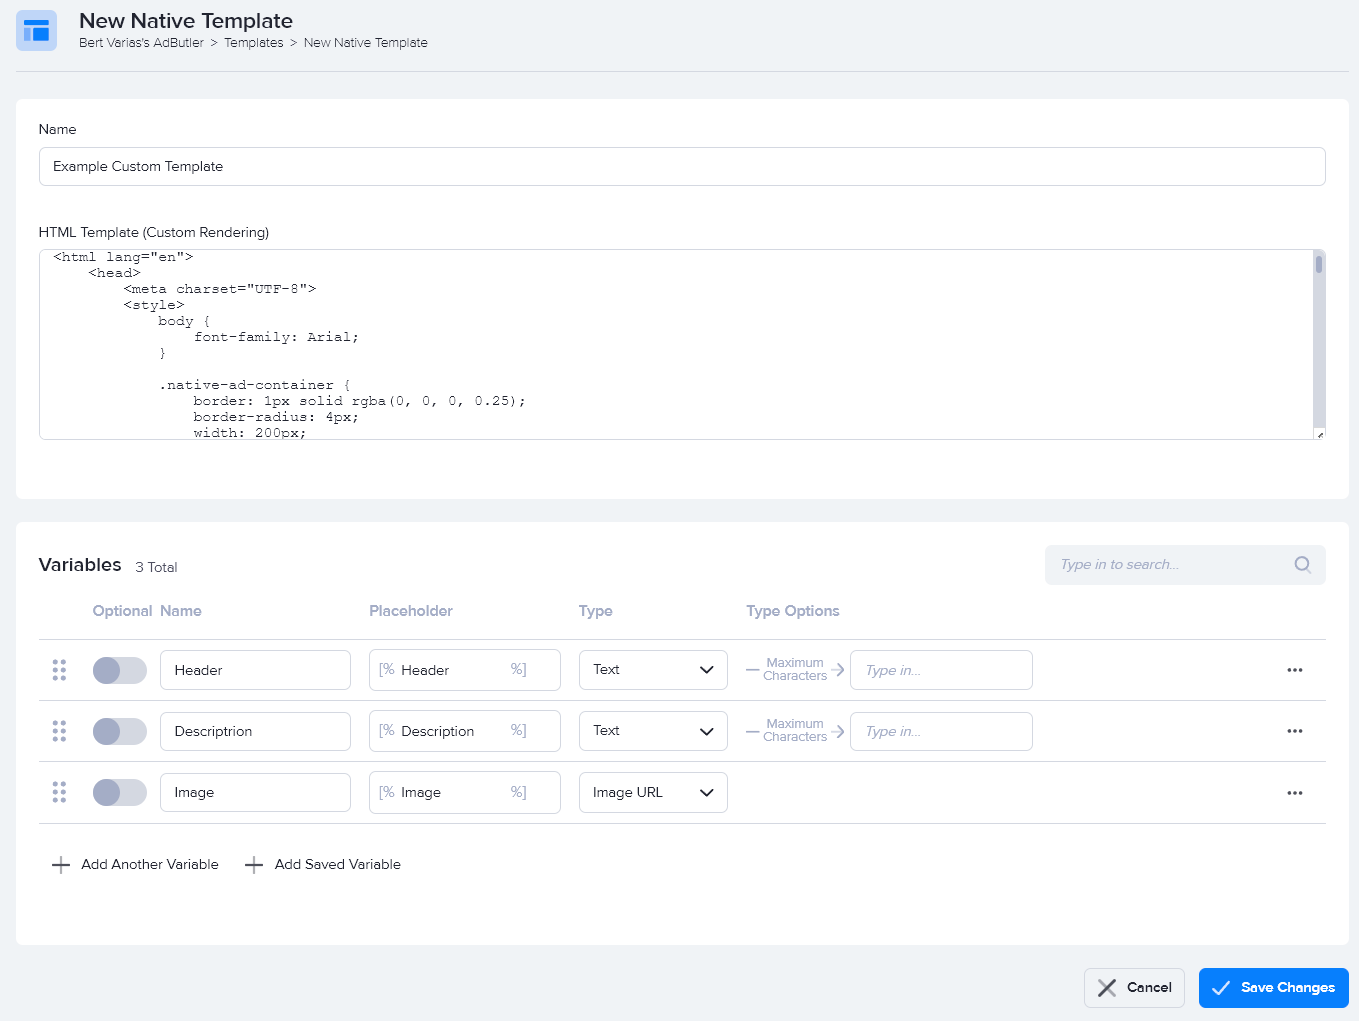
- Enter the code in the HTML Template field, then click Save Changes.
Here's the code we used in our example:
<!DOCTYPE html>
<html lang="en">
    <head>
        <meta charset="UTF-8">
        <style>
            body {
                font-family: Arial;
            }

            .native-ad-container {
                border: 1px solid rgba(0, 0, 0, 0.25);
                border-radius: 4px;
                width: 200px;
                padding: 10px;
                position: relative;
                box-sizing: border-box;
            }

            .native-ad-container > * {
                margin: 0;
            }

            .native-ad-image {
                width: 100%;
                margin-bottom: 16px;
            }

            .native-ad-header {
                font-size: 20px;
                margin-bottom: 8px;
            }

            .native-add-description {
                color: rgba(0, 0, 0, 0.5);
                display: inline-block;
                margin-bottom: 16px;
            }

            .native-ad-button {
                font-size: 14px;
                text-align: center;
                background-color: #eee;
                border: 1px solid #ccc;
                border-radius: 3px;
                cursor: pointer;
                width: 100%;
                padding: 16px 0;
            }

            .native-ad-button a {
                text-decoration: none;
                color: rgba(0, 0, 0, 0.75);
                font-weight: bold;
            }

            .native-ad-close-button-container {
                position: absolute;
                top: 5px;
                right: 5px;
                cursor: pointer;
            }

            .native-ad-close-button {
                width: 21px;
                text-align: center;
                display: inline-block;
                color: #ffffff;
                font-size: 18px;
                background: #000000;
                border-radius: 21px;
                user-select: none;
            }
        </style>
    </head>
    <body>
        <div class="native-ad-container">
            <img class="native-ad-image" src="[%ImageURL%]" />
            <h1 class="native-ad-header">[%Header%]</h1>
            <p class="native-add-description">[%Description%]</p>
            <div class="native-ad-button"><a href="[TRACKING_LINK]">Find Out More!</a></div>
            <div class="native-ad-close-button-container">
                <span class="native-ad-close-button" onclick="closeButton()">×</span>
            </div>
        </div>
        <script>
            function closeButton() {
                document.querySelector('.native-ad-container').style.display='none';
            }
        </script>
    </body>
</html>
With your template saved, you can now use it to create ad items. However, if you're new to creating native ad items, we highly recommend that you learn more about the requirements for creating native ad items.
Native ad template variables
There are seven types of variables in AdButler's native ad template creator.

Text
A variable that accepts strings and has an optional maximum length limit. The maximum value of Max Length is 4,096. AdButler does not encode the string, and the only validation it considers is the max length. AdButler will warn you if you try to assign a string to this variable that is longer than the max length you set. If you leave the Max Length field empty, AdButler will assign the 4,096 character limit to your text variable.
URL (Encoded)
A variable that accepts only URLs and encodes them to be safely passed into HTML. For example, https://adbutler.com becomes

when encoded.
We recommend you use this type of URL for almost all native ad types.
URL (Raw)
A variable that accepts only URLs but doesn't encode them. This can be useful in specific cases outside of rendering the ad in HTML. For example, if you're going to use a native template to receive ad information in a JSON object, you may not want to have the URL encoded because you’ll be working with the JSON object directly.
Image URL
A variable that gives you the option to upload an image from a URL or from the Media Library. If you choose to use an image from AdButler's Media Library, the URL will be a link to the image file on AdButler’s servers.
Image Tag
A variable that renders the entire image as an <img> tag. Instead of adding the URL into an HTML tag to render the image, the image tag will render the image for them. The image tag will have only a source. It will not come with alt text or classes of any kind. This will likely only be useful in the most basic of image rendering.
Number
A variable that accepts only numbers.
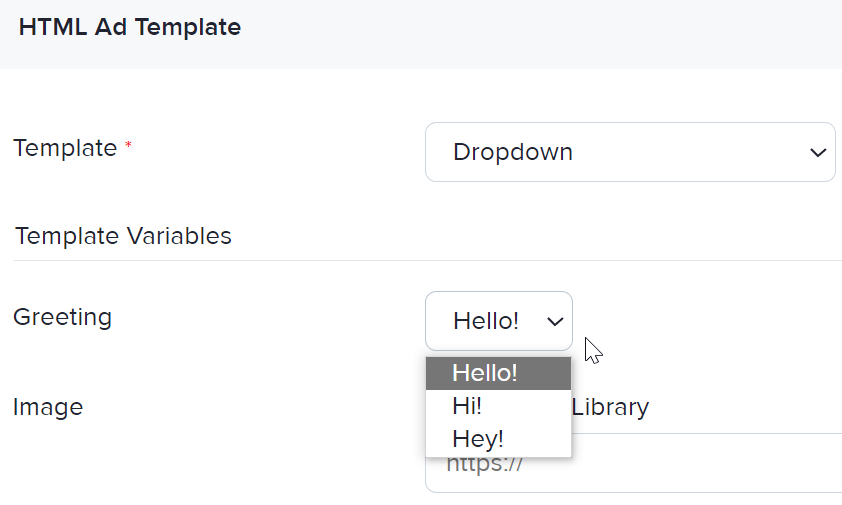
Dropdown
A variable with a finite set of values. When a template with a dropdown variable is used to create a native ad item, the user will choose one of those predefined values to assign to the variable.

The requirements for creating native ad items
Native ad items can be assigned only to certain zones. Further, custom native ad items also have zone size and ad item size requirements. The table below indicates the usual requirements. As you can see, most custom native ad items can be assigned to both Standard zones and Native (Custom Rendering/API) zones. However, there are custom native ad items that can be assigned only to Standard zones.
| Custom | Custom | Standard | Dynamic | Dynamic |
| Custom | Custom | Native (Custom Rendering turned ON) | Exact size of ad | Exact size of ad |
| Styled | Styled | Native (Custom Rendering on or off) | N/A | N/A |
How to create native ad items
- Go to the section of the relevant campaign (Your AdButler > Advertisers > Your Advertiser > Your Campaign).
- Click Add Ad Item in the Ad Items table. The Add Ad Item window will appear.
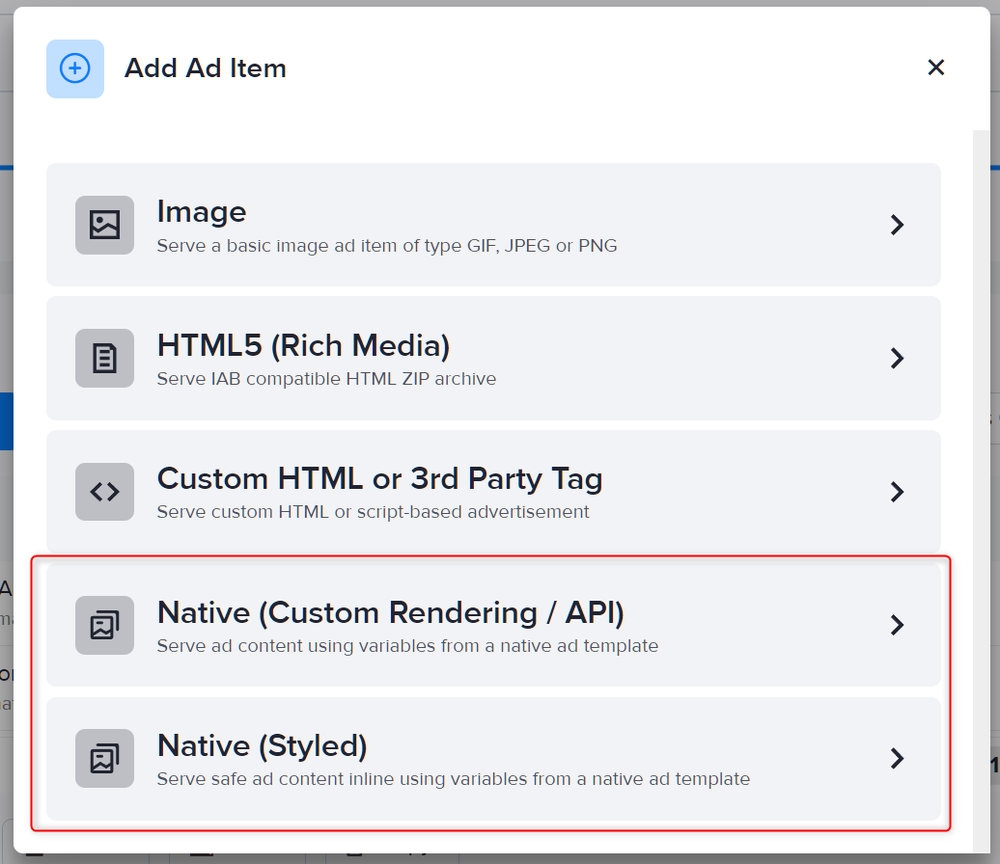
- Click on the type of native ad item that you want to create. To follow this guide, select Native (Custom Rendering/API). The New Ad Item page will appear.
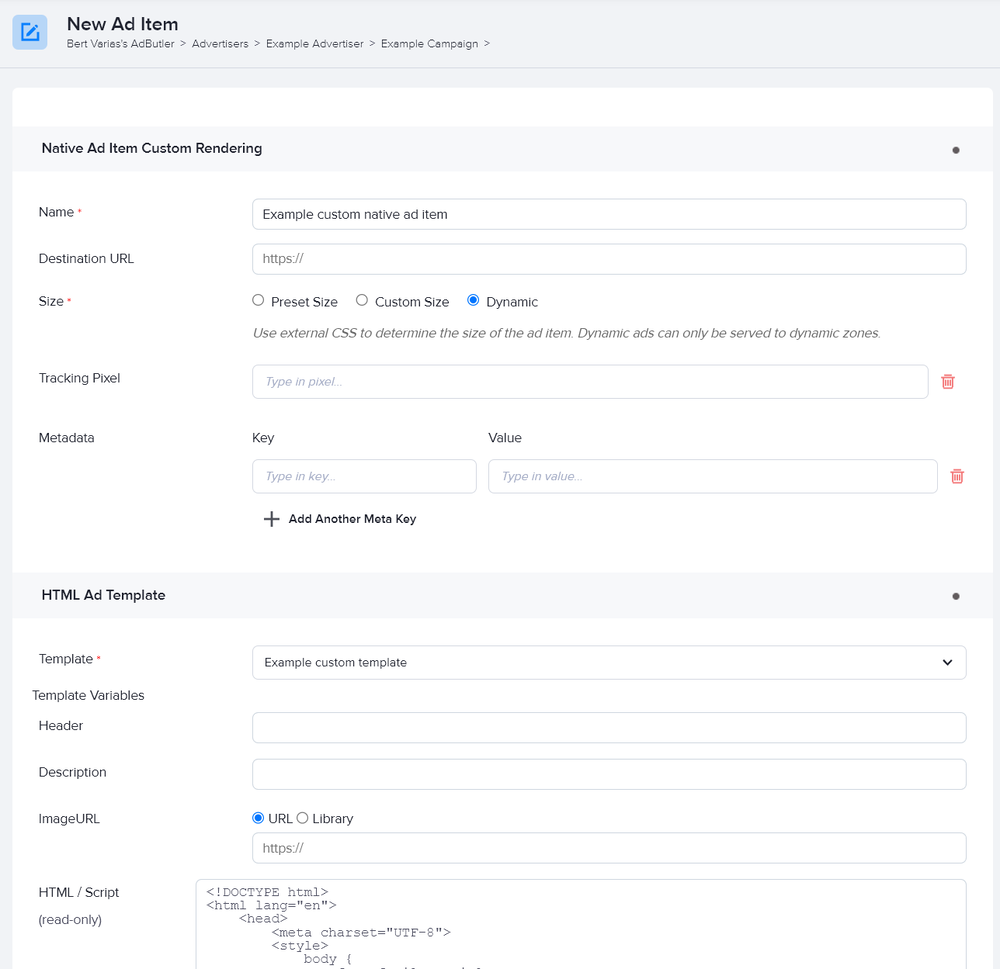
- Select your native ad template in the Template dropdown menu.
- When making a custom native ad item, you must set the ad item's size accordingly. Refer to the requirements for creating native ad items for more information.
- Fill in the rest of the fields as needed. If you entered a destination URL, you can test it by clicking Open Destination URL to the right of the field.
- Click Save Ad Item.
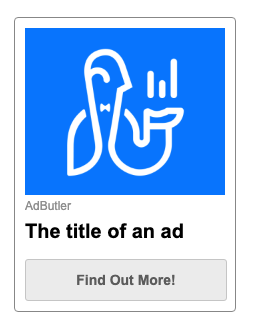
If you followed all the instructions and used the sample code in this guide, your ad should look similar to this when it's served:
