Campaign overview
Campaigns are a great way to manage multiple ad items, although it's possible to create a campaign that has only a single ad item. When you assign a campaign to a zone, you assign all the ad items under it. The ad items will have the same assignment details, but each ad item can be assigned a specific weight to allow you to prioritize one over another.
If a campaign contains ad items of varying sizes, only ad items compatible with the requesting zone will be considered for serving.
There are two types of campaigns. A Standard Campaign is for most ad items types, including images, HTML/Rich media, and email ads. A VAST Campaign is for VAST ad items.
Creating a campaign

- Go to the section of the relevant advertiser (Your AdButler > Advertisers > Your Advertiser).
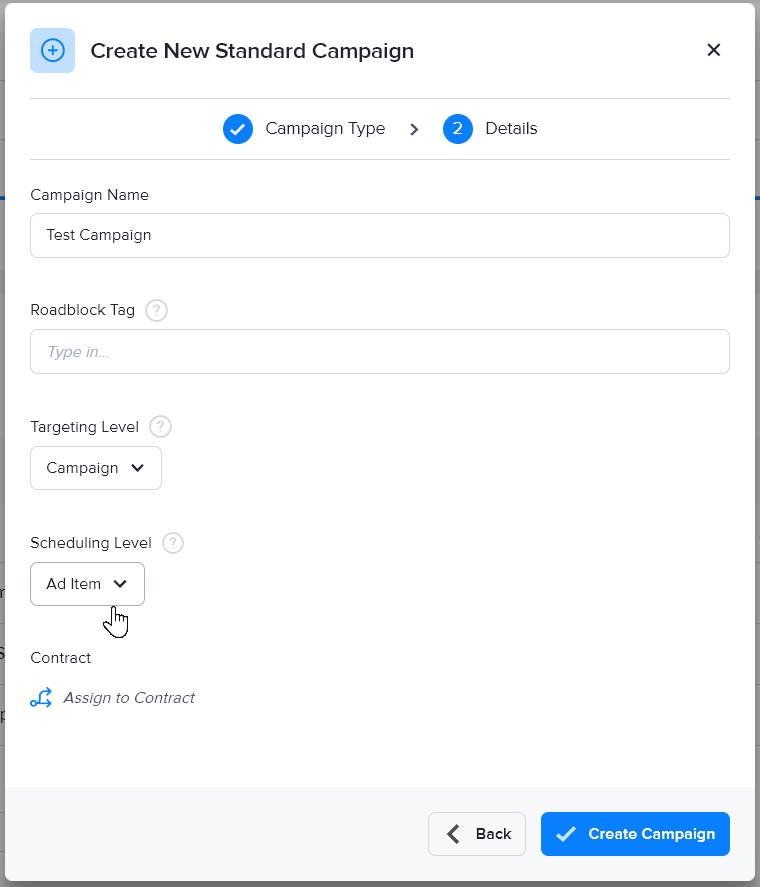
- Click Add Campaign above the table of campaigns. The Create Campaign window will appear.
- Choose whether to create a Standard or a VAST campaign.
- Name the campaign.

- Add a roadblock tag. (optional)
- Choose whether you want to configure and apply targeting options to the whole campaign or per ad item. You cannot change this setting once the campaign has been created.
- Choose whether you want to configure and apply scheduling options to the whole campaign or per ad item. You cannot change this setting once the campaign has been created.
- Assign the campaign to a contract. (optional)
- Click Create Campaign.
Tips for using campaigns
- Create a campaign for each unique ad campaign you are running.
- Do not reuse previous campaigns and zone assignments.
- Come up with a descriptive naming convention for your campaigns. This will make it easy to identify them throughout the AdButler interface, as well as search for them using the search bar.
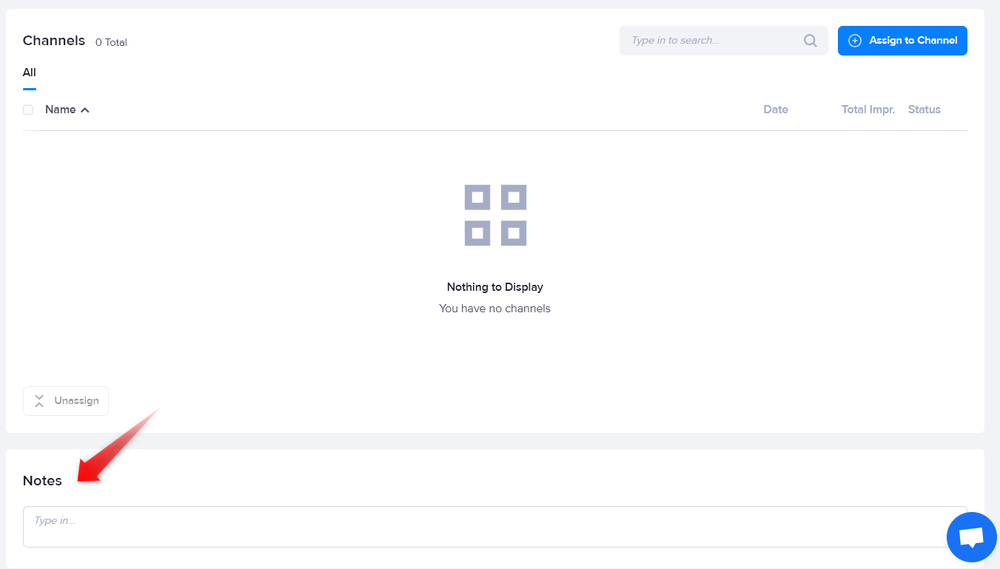
- You can leave comments and other text in the Notes block at the bottom of a campaign's section.

- Remember that each ad item within a campaign can have a unique weight and can be paused individually.
- You can preview how the ads in a campaign will be served by clicking Live Ad Preview on the Others menu of the campaign's section.
- You can filter the information shown on both the table of ad items assigned to a campaign and the table of zones in which the campaign has been assigned. Note that the Status column is always visible.
The default view is Show All Columns:

Click on the dropdown menu on the upper-right of the tables to filter the columns. Select Stats Columns to show only metrics such as eligible impressions, viewable impressions, and clicks:

Finally, select Setup Columns to show information related to the properties of the ad items or zones—the date when an ad item was created, the ad item or zone size, and weight:
